
Introduction
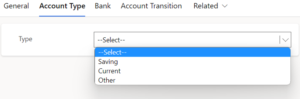
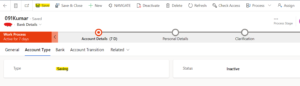
In Power Automate, in a few of the scenarios we need to optionset label, the following show how to take optionset label. Step1 First we need to create optionset field in dynamics 365, I have created field as show in the figure.
Step 2
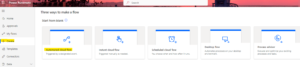
Login to the required Power Automate environment using URL make.powerautomate.com by providing the user name and password and click on Create on the left-hand side and after chose the Automated Cloud Flow as shown in the below figure
Step 3
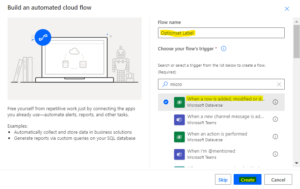
After step 2, click on the trigger as When a row is add, modified and delete, and Give the Flow Name Then click on Create as shown in the bellow figure
After step 2, click on the trigger as When a row is add, modified and delete, and Give the Flow Name Then click on Create as shown in the bellow figure
Step 4
After step 3 , Take the “Change type” and “Table name” and “Scope” as show in the bellow figure.

After step 3 , Take the “Change type” and “Table name” and “Scope” as show in the bellow figure.
Step 5
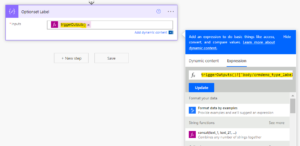
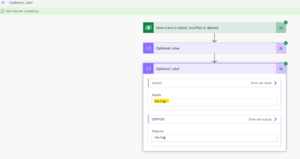
After step 4, click on + New Step and Take the Compose Action and click on Inputs and select 2nd tab Expression and type “triggerOutputs()?[‘body/crmdemo_type_label’]” and update as show in the below figure
After step 4, click on + New Step and Take the Compose Action and click on Inputs and select 2nd tab Expression and type “triggerOutputs()?[‘body/crmdemo_type_label’]” and update as show in the below figure
Step 6
After step 5, Save the flow and create or modified a record in dynamics 365
then the flow is trigger and run success as show in the below figure.
After step 5, Save the flow and create or modified a record in dynamics 365
then the flow is trigger and run success as show in the below figure.