Sharepoint
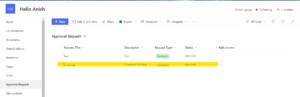
In this article, you will see how to create a simple approval app using PowerApps and Flow in SharePoint Online. To get started refresh your knowledge of PowerApps and Flow. I have created a custom list in SharePoint Online named Change Request which contains the following columns.
We will learn how to create an app using PowerApps Studio and a simple approval process using Flow. The status column will be updated as Approved or Rejected after the completion of the approval process

Create an app for SharePoint Online List using PowerApps
Click on Integrate->Click on PowerApps->Create App
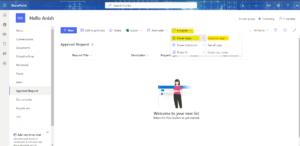
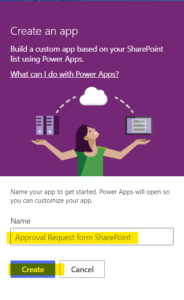
It will Navigate the Screen on right side Corner give the name and wait for new second
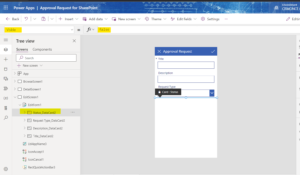
By default, the generated app contains Browse, Detail, and Edit screen.

Navigate to the Edit screen, select Status card, and then select Visible property in the property box. Set visible property value to false in the formula bar so that the Status field will not be shown to users in edit/new form.
Save and Publish the App.
Create a Power Automate Flow
Integrate->PowerAutomate->Create flow

Click on see more Template after that Create a blank Instant Cloud Flow and select blank

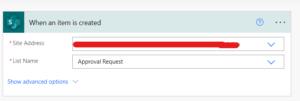
Search for SharePoint and select SharePoint – When an item is created
Enter the URL and select the list name from dropdown. Click New Step.
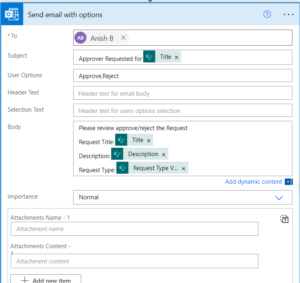
Click New Step Search for Office 365 Outlook and then select Office 365 Outlook->Send email with options.
Fill in all the required details as shown below,
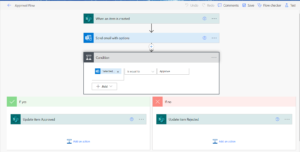
Click the Next Step and then click Add a condition and Set the condition as shown below,

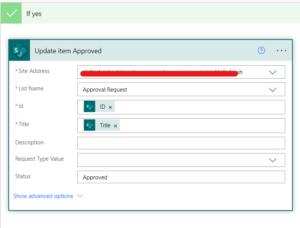
If the condition is satisfied, add an action to update the Status field to Approved.Search for Update Item and then select SharePoint – Update item
Make sure you are connected to your SharePoint Online site and fill in all the required details as shown below
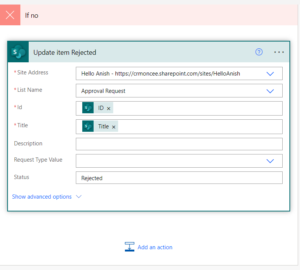
If the condition is Not satisfied, add an action to update the Status field to Rejected. Search for Update Item and then select SharePoint – Update item
Flow created successfully. Click Save Button
Open the power apps->BrowseScreen1
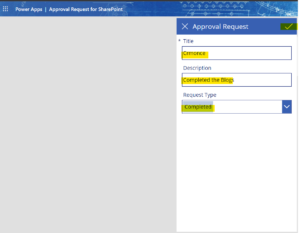
Click the “+” icon to create a new item

Enter the details and click the tick icon
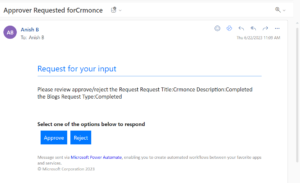
Item is created successfully. Approver (I have added myself – anish.b as approver) will receive an email to approve or reject in Office 365 Outlook.
Navigate to list and you could see the Status field got updated to Approved