
Introduction power apps:
In this Powerapps Tutorial, We will discuss how to create a Data Table from the Excel Data using Powerapps.
Also, we will see various properties and alignments of the Data table in Power Apps.
To create a Data Table From Excel Data using Power Apps, We have to follow these two steps as:
*Create an Excel file and Format that Excel file as Table
*Rename the Excel File Name and Upload it into OneDrive for Business
*Create a Canvas app from Excel using Power Apps
Create and Format Excel as Table and Upload it into OneDrive for Business.
Follow the below processes:
*Create an Excel file using some sample records as below.
*Open the Excel file, go to the Home tab. Click on Format as Table option and select any table format
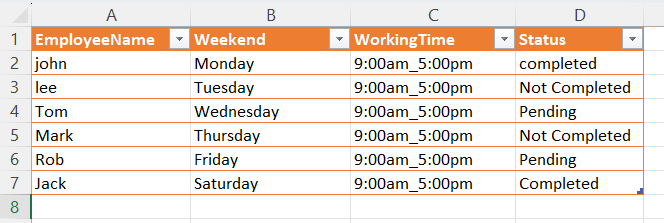
*Change your Excel Table name (Employee_Work_Status) and Save it.
*Upload your Excel file into any Cloud-Storage account like OneDrive, OneDrive for Business, etc.
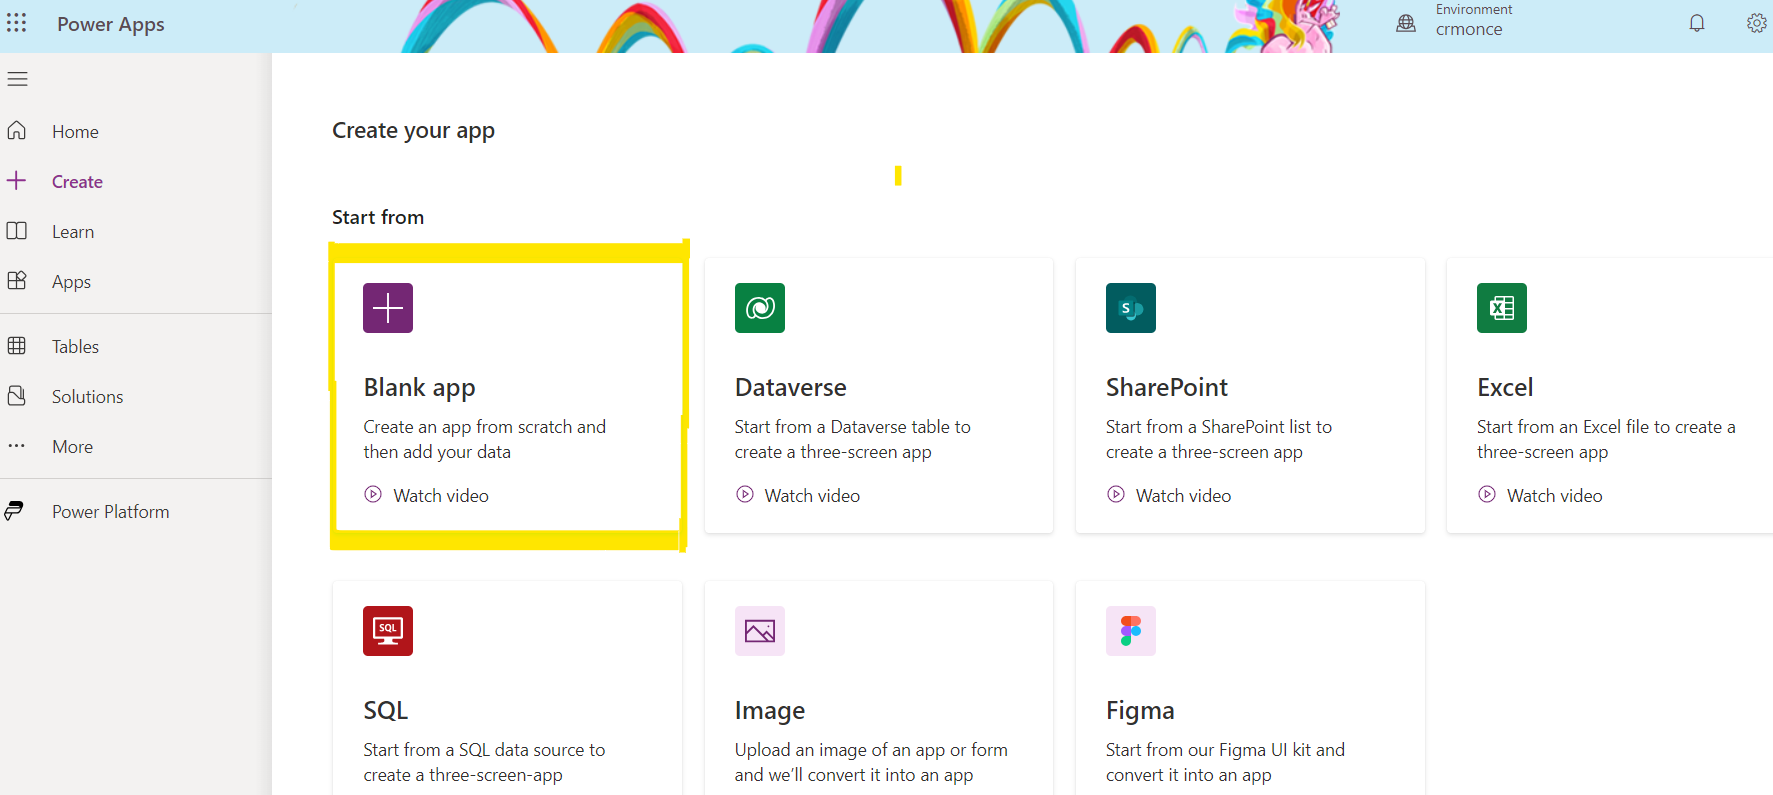
Step-1: (Create Canvas app from blank)
*Open the Power Apps page through the Browser. Sign in your Power Apps using Microsoft account.
*In the Power Apps page, Select the Canvas app from blank under Make your own app as shown below.
Step-2: (Specify Name for App)
*Provide a name for your new app (EmployeeWorkStatus), Select any format as Tablet or Phone and then click on Create.

Step-3: (Create a New Screen)
Go to Home tab -> New screen -> Click on Blank as shown below.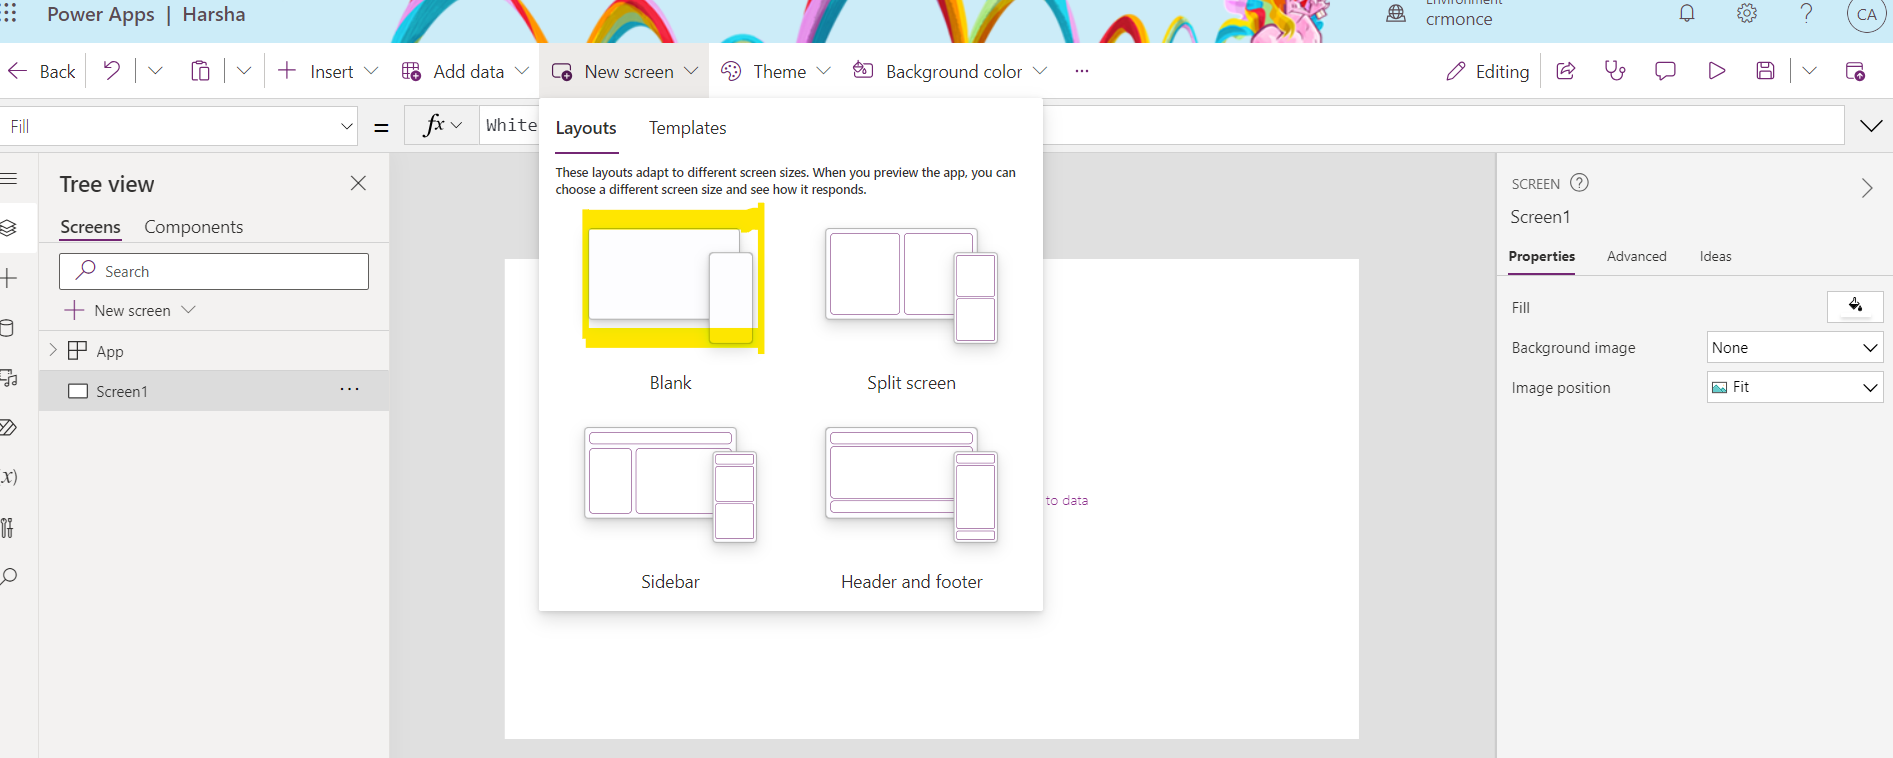
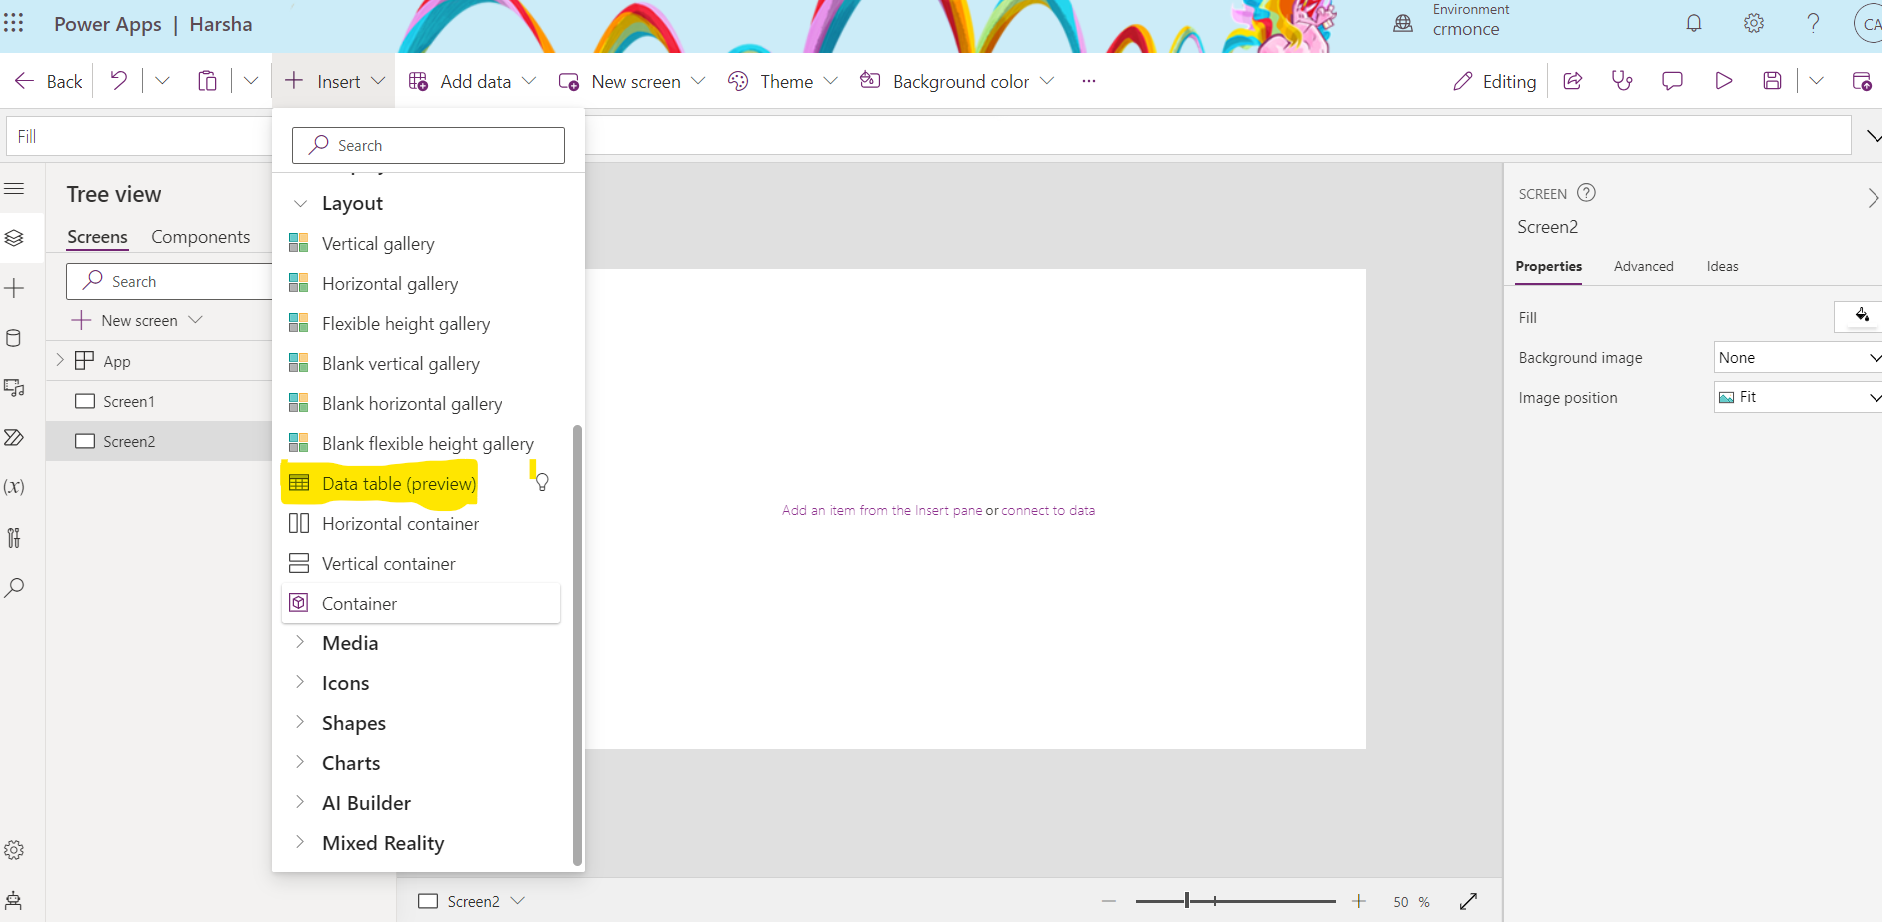
Step-4: (Create a Data table)
Go to Insert tab -> Click on Data table as like below screenshot.
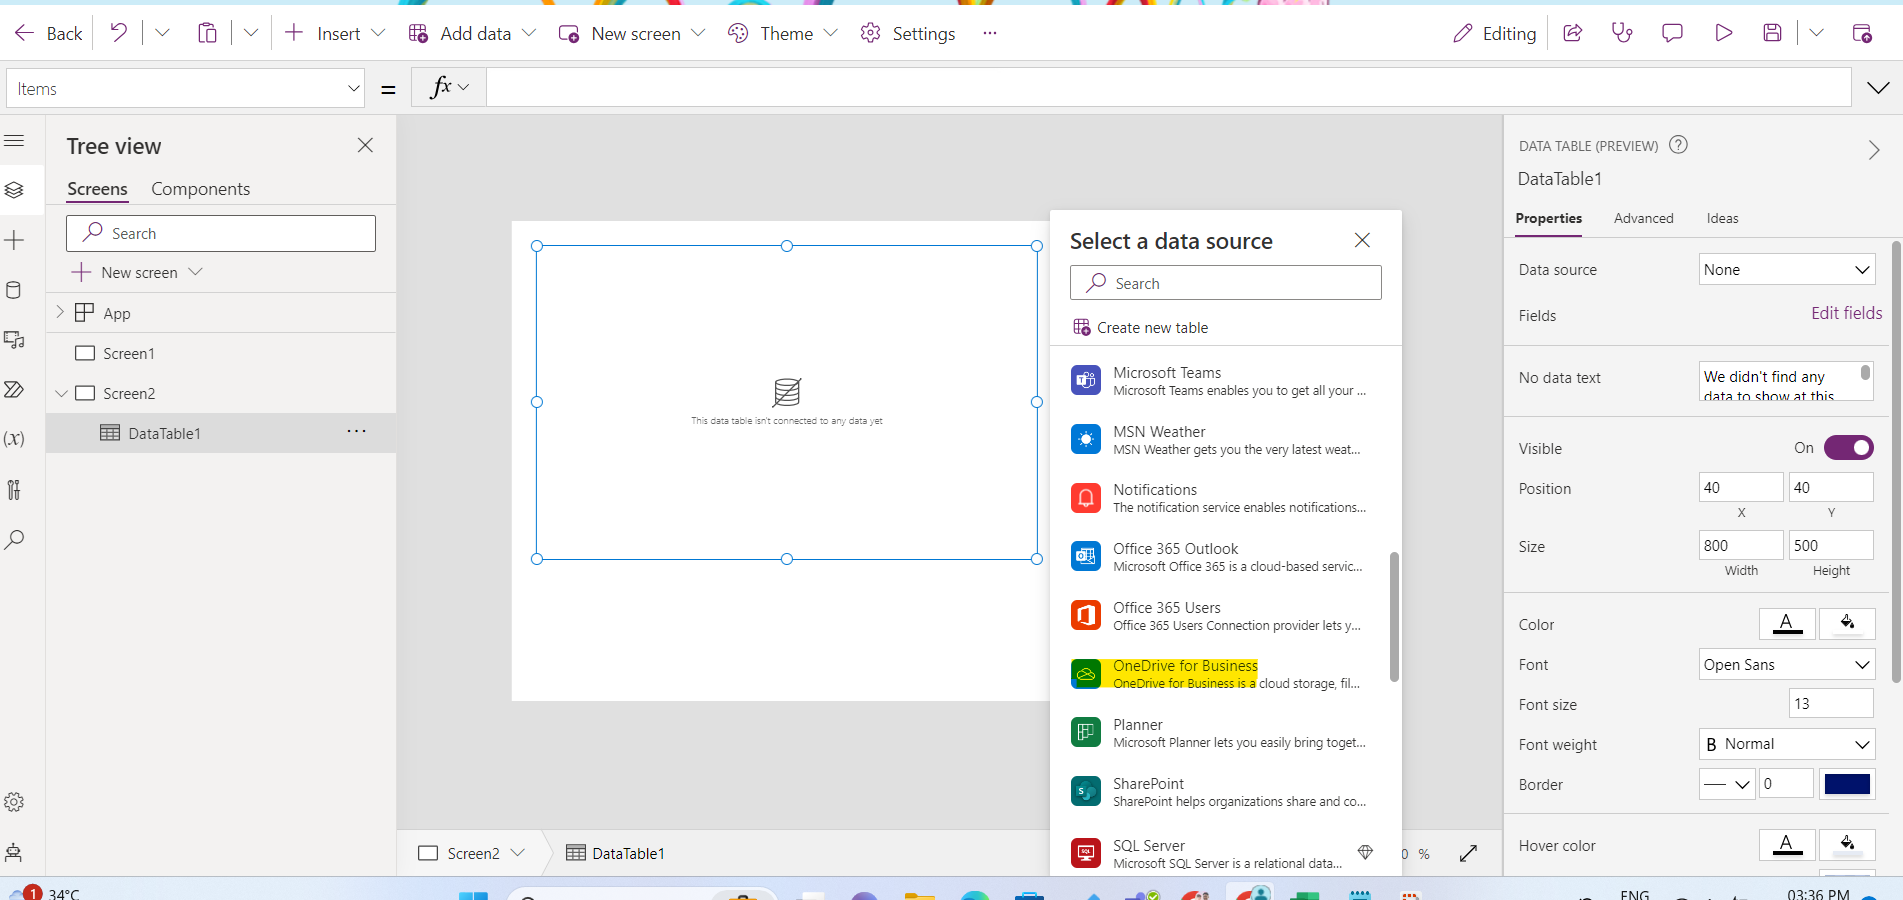
Step-5: (Connect to Data Source)
*Select connect to data link option in the middle of the screen.
*The Data sources will appear on the left side of the page once you clicking on the link. Expand the Connectors and select the connection for your cloud-storage account if it shows in that Data sources.
*Otherwise if it not appears, then you can easily add a new connection using +Add a connection.
*Otherwise if it not appears, then you can easily add a new connection using +Add a connection.
* Select OneDrive for Business under the Connectors section and add your connection.
Select the data source as Employee_Work_Status as shown below.
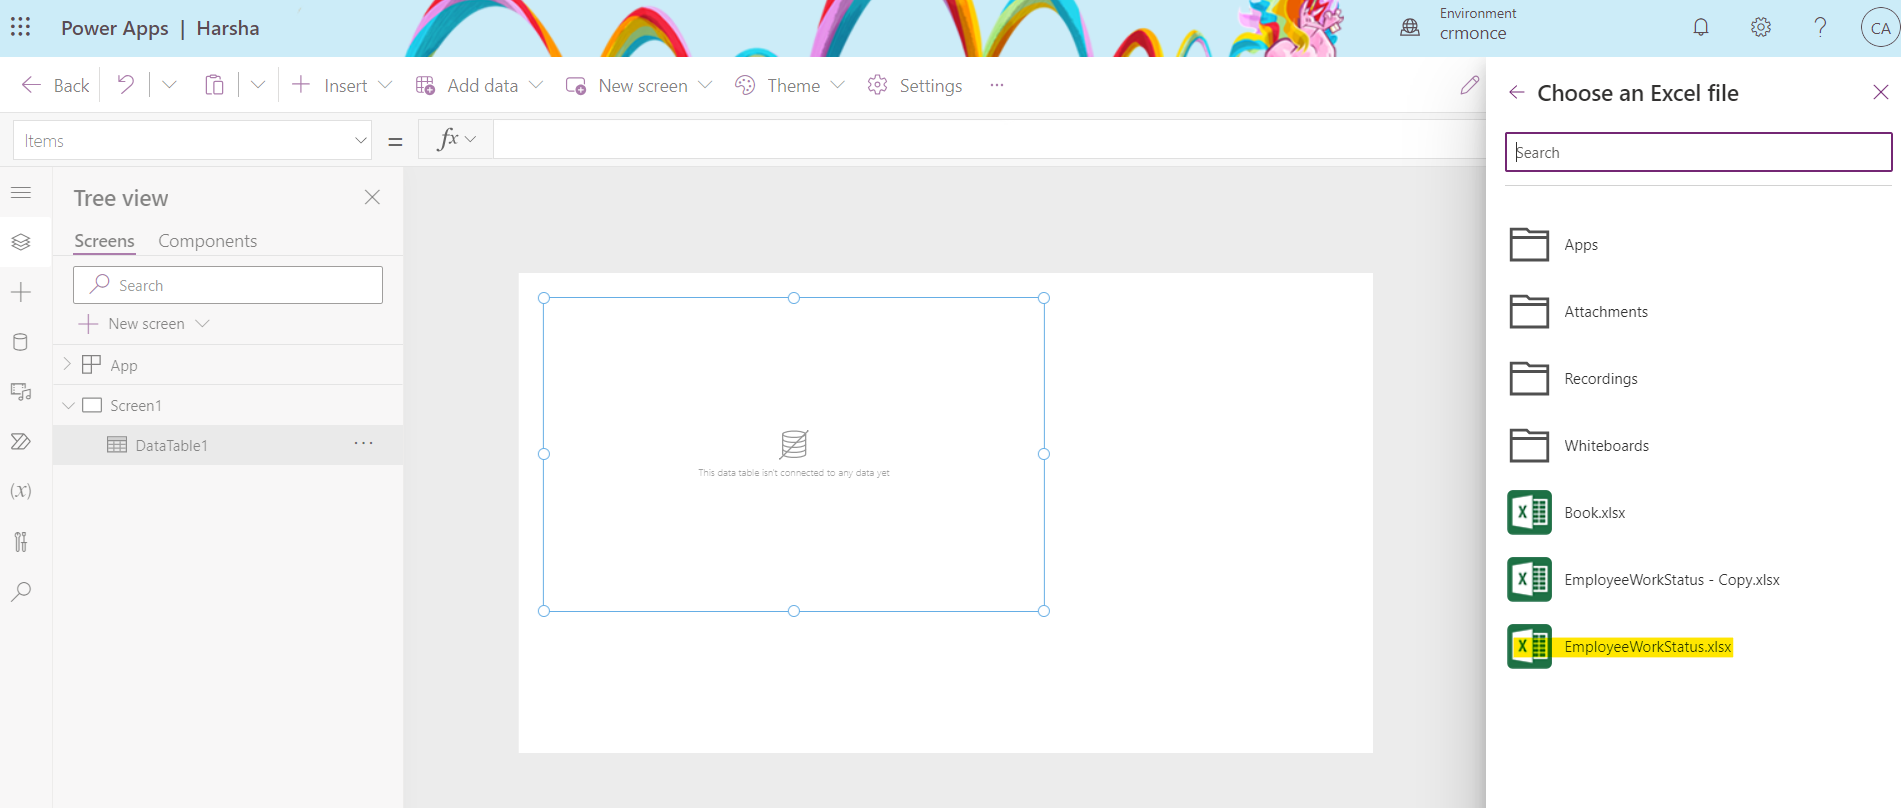
Step-6: (Choose an Excel file)
In the Choose a table section, select the checkbox for Employee_Work_Status and then click on to Connect. Now you can close your data pane by using a cross icon.

Now you can see the Data Table will be ready to use for your requirement. Just you need to add all fields into the Data Table.

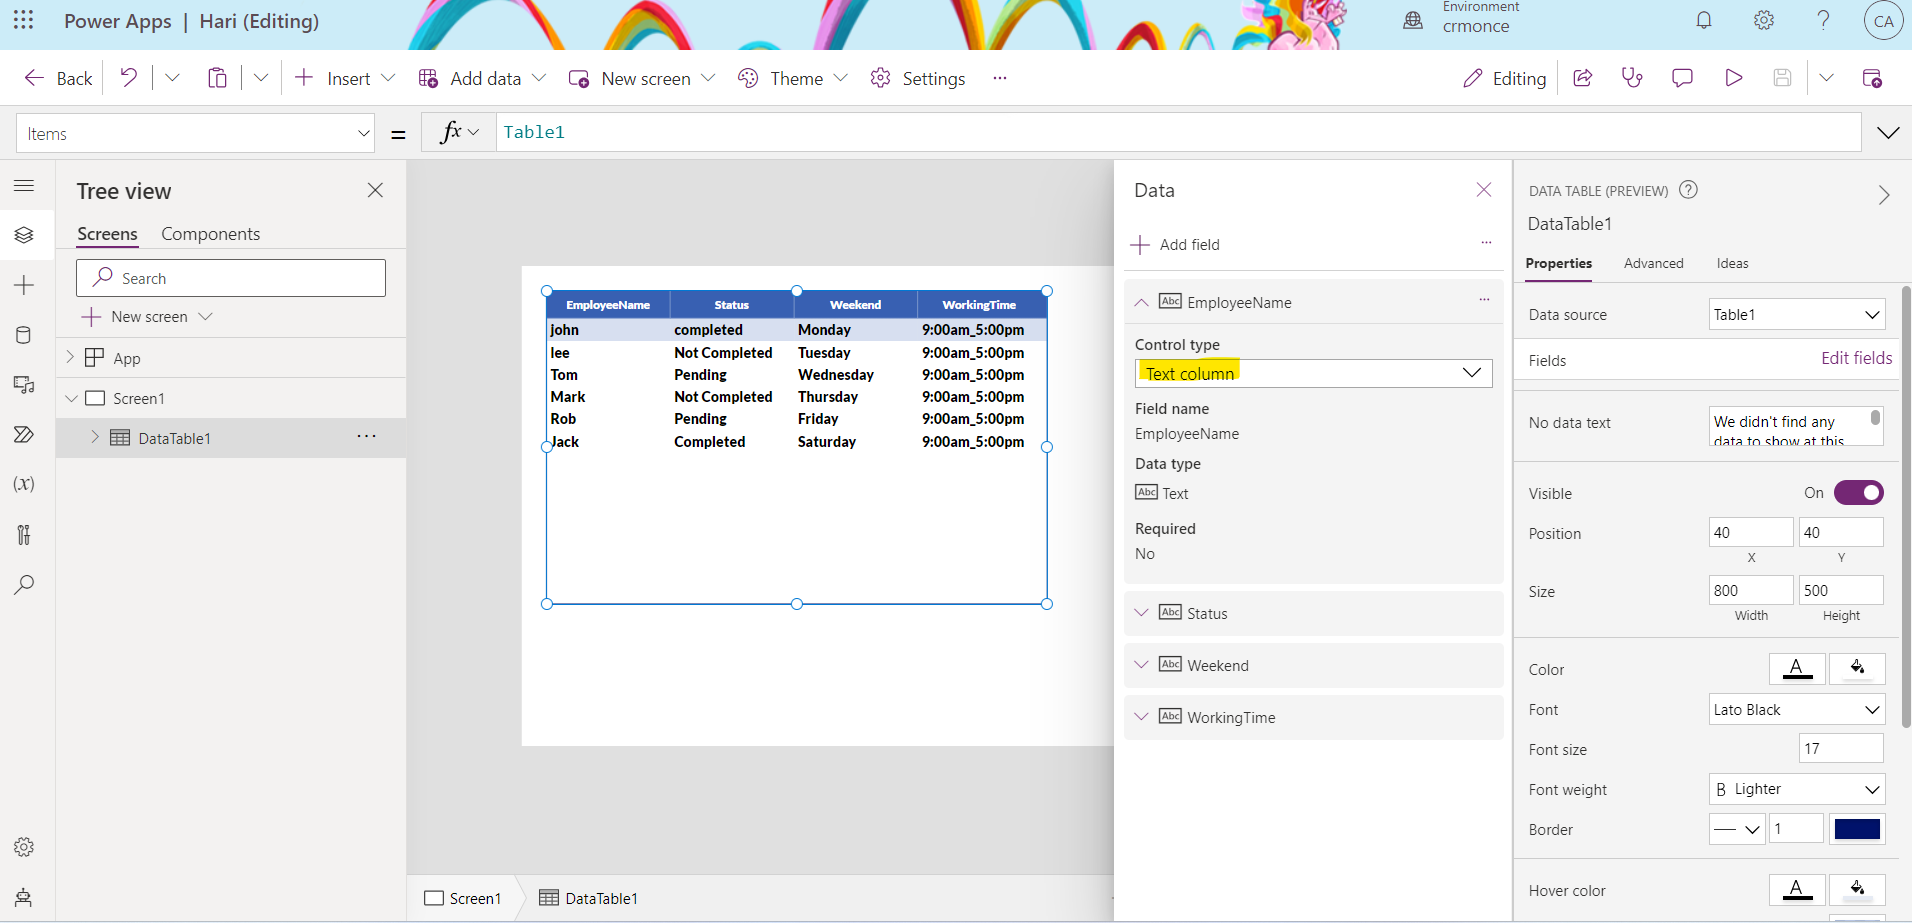
Step-7: (Edit field Data in Data Table)
*Select the Data Table and go to the Properties tab on the right side.
*Select the Data source as Employee_Work_Status from the drop-down.
*Click on Edit fields from the Fields section.
*Click on Edit fields from the Fields section.
*Click on the “+Add field” and choose one or more fields as per your requirement.
*Click on the Add button.

After adding all the fields into the Data table, you can see your records as a table format like the below screenshot.
In the Data field section, you can see the properties of each data as like:
*Control type: It specifies the control type of a field.
*Field name: It specifies the name of the field.
*Data type: It specifies the data type of a field.
*Required: It specifies the field is required or not.
In this Powerapps Tutorial, We discussed how to create a Data Table from the Excel Data using PowerApps.
*Click Edit fields from Fields section.