Power Automate Introduction
Power Automate allows you to send emails when certain things take place automatically.
1. When a record is created.
2. When a record is created or updated.
This article focuses on the Power Automate send email feature using Power Automate Cloud flow.
There are three different components that make automation solution for sending emails using Power Automate.
a. Triggers
b. Connector
c. Email Content
Sending an email may be the only purpose of a flow or it could be one of the many actions a flow performs.
We need to identify which triggers the flow will run. This is the first step to creating any flow.
a. When an event occurs, or something changes in a system.
b. A specific day or a specific time.
c. It automatically starts the flow from any device.
The next step is to make use of a built-in connector to send the email using an email application.
Connectors in Power Automate establish a connection between Power Automate and other services.
There are hundreds of connectors built into Power Automate which are available for use in Power Automate.
Some of the standard connectors available for sending emails are Mail, Office 365 Outlook, and Outlook.com
You will need to provide the content for any email that Power Automate will be sending.
The content for an email is usually stored in a cloud-based data source, but you can also build emails completely from scratch (including formatting) within the flow.
We can include images and attachments in Automated emails as well
We can include images and attachments in Automated emails as well.
Let’s now see how to send an email using an example.
Let’s assume that we have users who attended a training course. We would like to send them an email for them once they have successfully completed the training course.
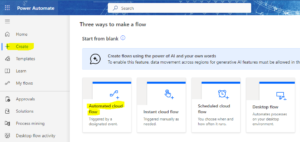
Create an Automated Cloud Flow – Click on Automated Cloud Flow under New Flow, as shown in the below screen.
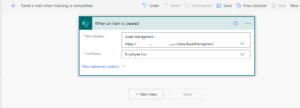
Enter the Flow Name, select your trigger in a Flow like when an item is created, and click on Create, please refer below screen short. Next, we need to select the site address and list name.
Click on Variable under the Built-In Tab. Select Initialize Variable.
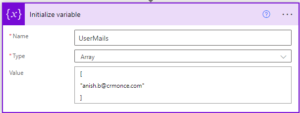
Enter Name as “UserEmails”, select Type as “Array”, and enter a list of email IDs using a comma as a separator.
Each email ID has to be entered within double quotes, and the entire array is enclosed in square brackets. Currently, I am using only one email id.
Click on Control under the Built-in tab and select Apply to each
Inside the Apply to each action, click on Add an action. Click on Office 365 Outlook under the Standard tab and select Send an email (V2).
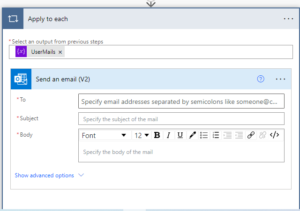
Now, Let’s enter values into the fields.
Click inside the field, click on Add dynamic content, and select Current item under Apply to each. With every iteration, the loop picks one email address from the UserEmails array variable as the Current item.

Let’s add the Subject, and there is a tool pane available in the Body section where we can do some basic formatting to the email body.

Finally, let’s Save flow.
Now, navigate to the SharePoint list and try to add new items of employees who have completed training.
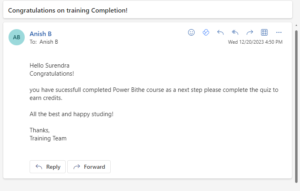
Once a new item is added, a flow will automatically trigger, and the employee will receive an email.
For any Help or Queries Contact us on info@crmonce.com or +919014146800.

