- Open Visual Studio
- Take new project
- Search and select Class Library(.NET Framework)
- Change the name
- Change the Destination of the folder
- Click create
Next,
Enter the below Code
using System;
using System.Activities;
using System.Collections.Generic;
using System.Linq;
using System.Text;
using System.Threading.Tasks;
using Microsoft.Crm.Sdk.Messages;
using Microsoft.Xrm.Sdk;
using Microsoft.Xrm.Sdk.Query;
using Microsoft.Xrm.Sdk.Workflow;
namespace test.CustomActivities
{
public class AddContacttoMktgList : CodeActivity
{
[RequiredArgument]
[Input(“Contact”)]
[ReferenceTarget(“contact”)]
public InArgument<EntityReference> Contact { get; set; }
[RequiredArgument]
[Input(“MarketingList”)]
[ReferenceTarget(“Vinay”)]
public InArgument<EntityReference> MarketingList { get; set; }
protected override void Execute(CodeActivityContext executionContext)
{
var tracingService = executionContext.GetExtension<ITracingService>();
var context = executionContext.GetExtension<IWorkflowContext>();
var serviceFactory = executionContext.GetExtension<IOrganizationServiceFactory>();
var service = serviceFactory.CreateOrganizationService(context.UserId);
var contact = this.Contact.Get<EntityReference>(executionContext);
var mktgList = this.MarketingList.Get<EntityReference>(executionContext);
if (contact != null && mktgList != null)
{
AddMemberListRequest amReq = new AddMemberListRequest();
amReq.EntityId = contact.Id;
amReq.ListId = mktgList.Id;
AddMemberListResponse amRes = (AddMemberListResponse)service.Execute(amReq);
}
}
}
}
Right Click on your solution,
Click Manage NuGet Packages
Next
Install below packages showing in the picture

- Right Click on the (.cs),
- Next Click Properties
- After Click Signing,
- Click Sign the assembly,
- Click on the box,
- Select New,
- Enter Some name,
- Unselect the Password protect,
- Save.

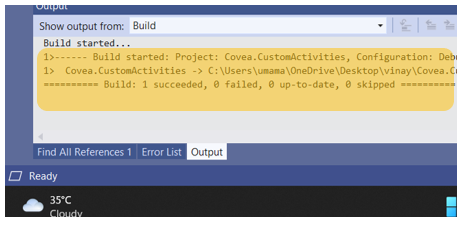
Final Output

Now Open XRMtoolBox,
Next install and open the Plugin Registration

Click Register and then Click Register New Assembly
upload .dll file created from visual studio
After Selecting the File,
Click Register Selected Plugins
After that finally it was Registered to our organization through Xrm

Next
Open Sales Hub app
Copy the Reference Target of marketing list (vinay)

Next
- In the, Marketing List Click new
- Next, Paste the name that we copied from the visual studio,
- Click Targeted At and select Contact
- Click Save and Close

Next
Go to the Processes and click new then enter the details
- Enter Practice Name
- Category will be workflow
- Entity will be contact
- And select Run this workflow in the background
- Finally Click ok

- After Opening,
Change scope to the organization - Next click on Add step
- Then we will find the triggers that we have registered from the XRMToolBox
- Select the trigger

Next
After we will see like this.
Next, Click Set Properties

After opening set properties,
- Fill first one with contact
- Second one as what we created in the marketing list (vinay)
- After click save and close

Next,
1.Click Save
2.After Click Activate

To see the workflow is working or not


After Opening,
1.Click on the members,
2.Finally we can see the contacts here Successfully


