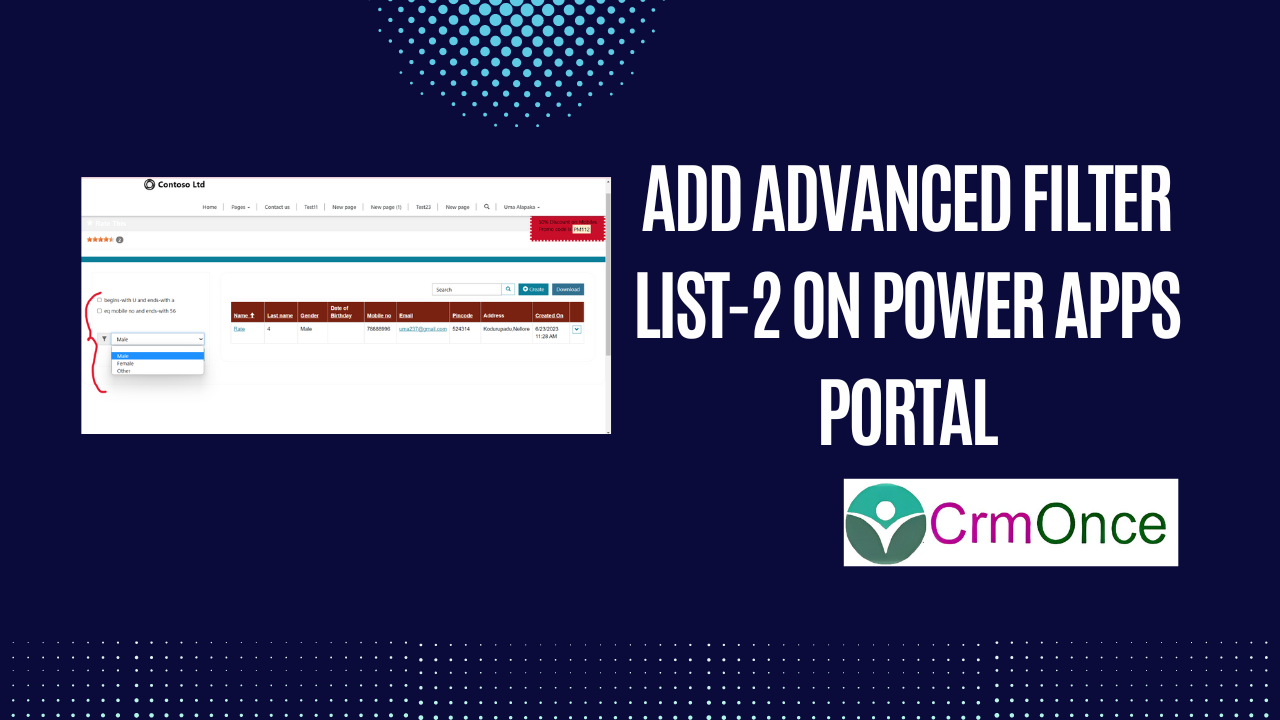
Power Apps Portal:
In this Blog ,We Filter the list by using checkboxes/Radio button/drop-down list, each of which tries to match its condition against a specified attribute of the given table.
If you want to add Filter in Entity List for to filter records in PowerApps Portal follow the below steps:
1.Navigate—>Portal management app.
2.Open the list on which you want to add the filter option.
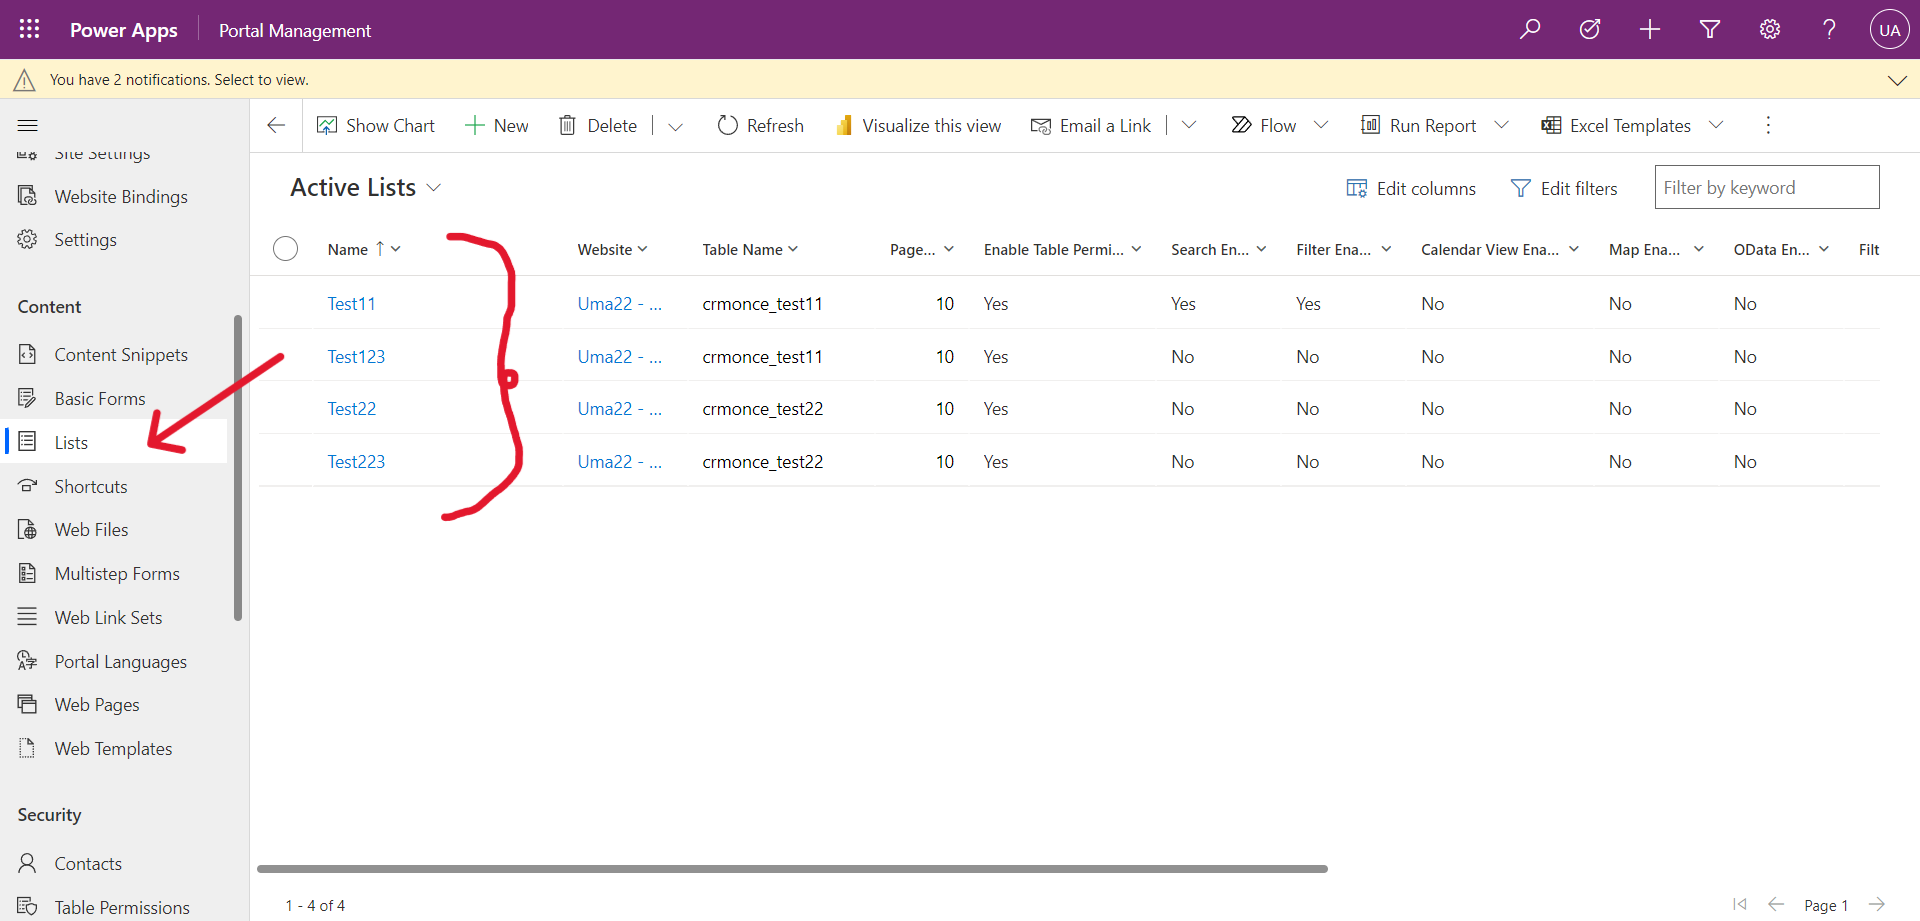
3.Next, Scroll down and go to Metadata Filter Tab and Enable Metadata Filter in General tab.
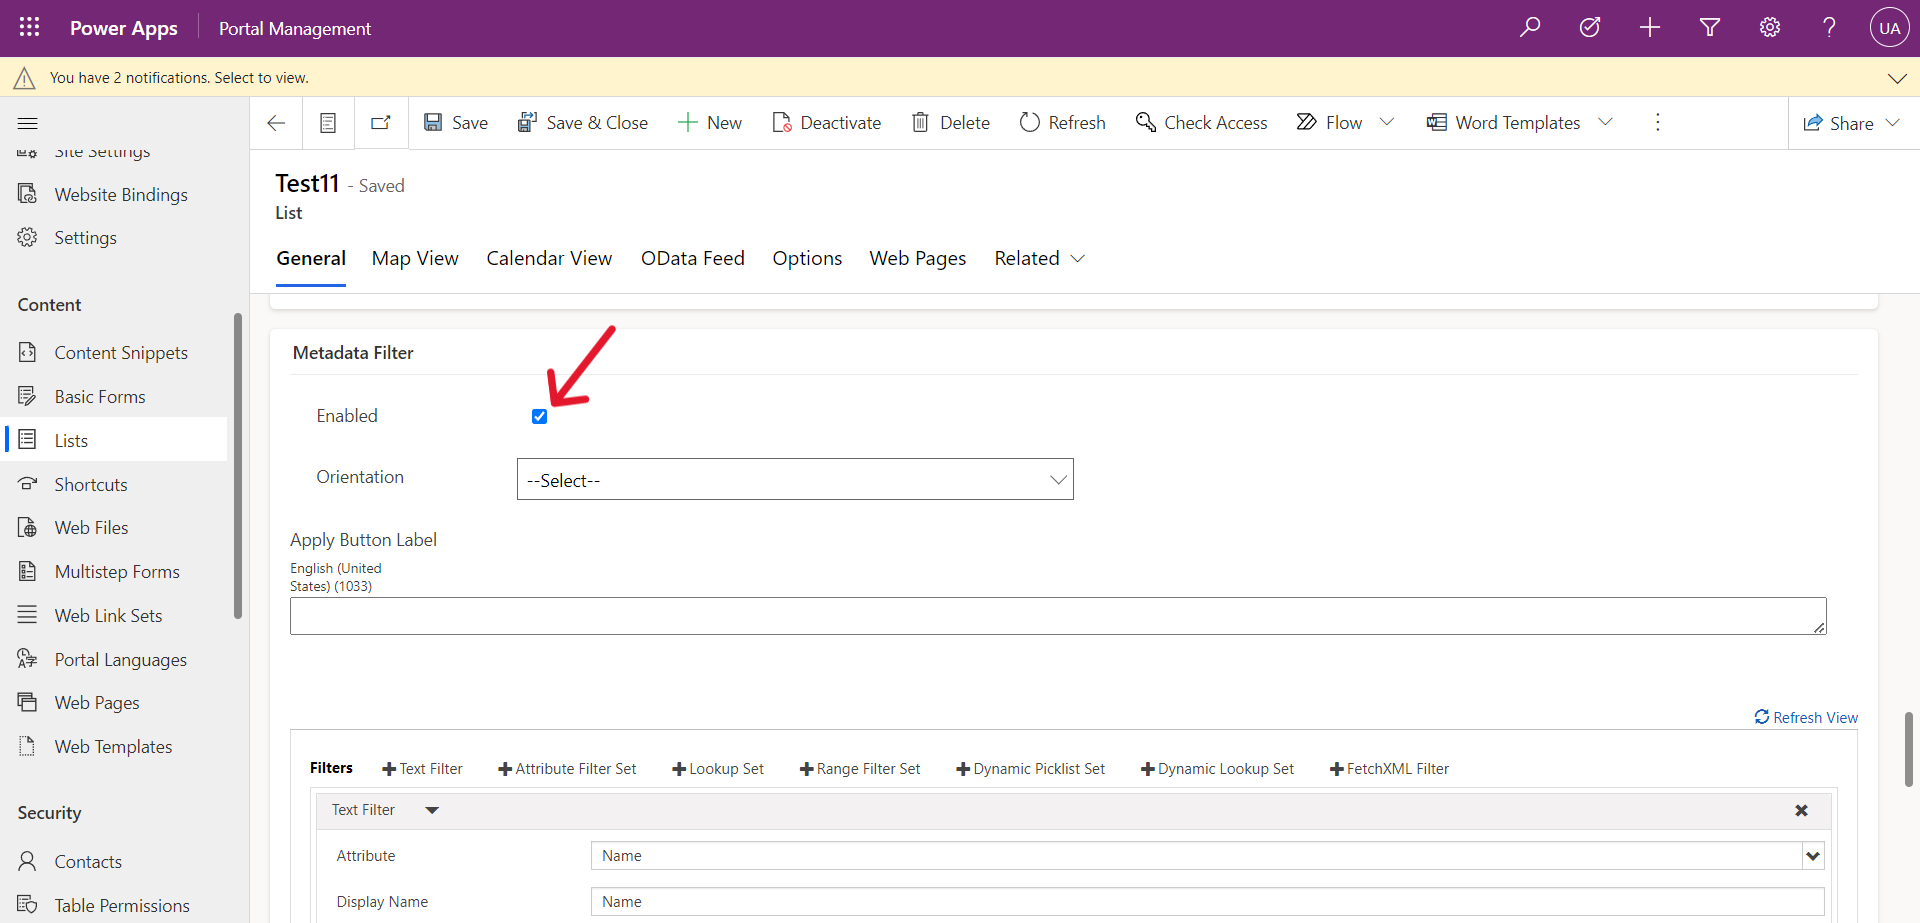
4.Now Select orientation i.e,Vertical,Horizontal.
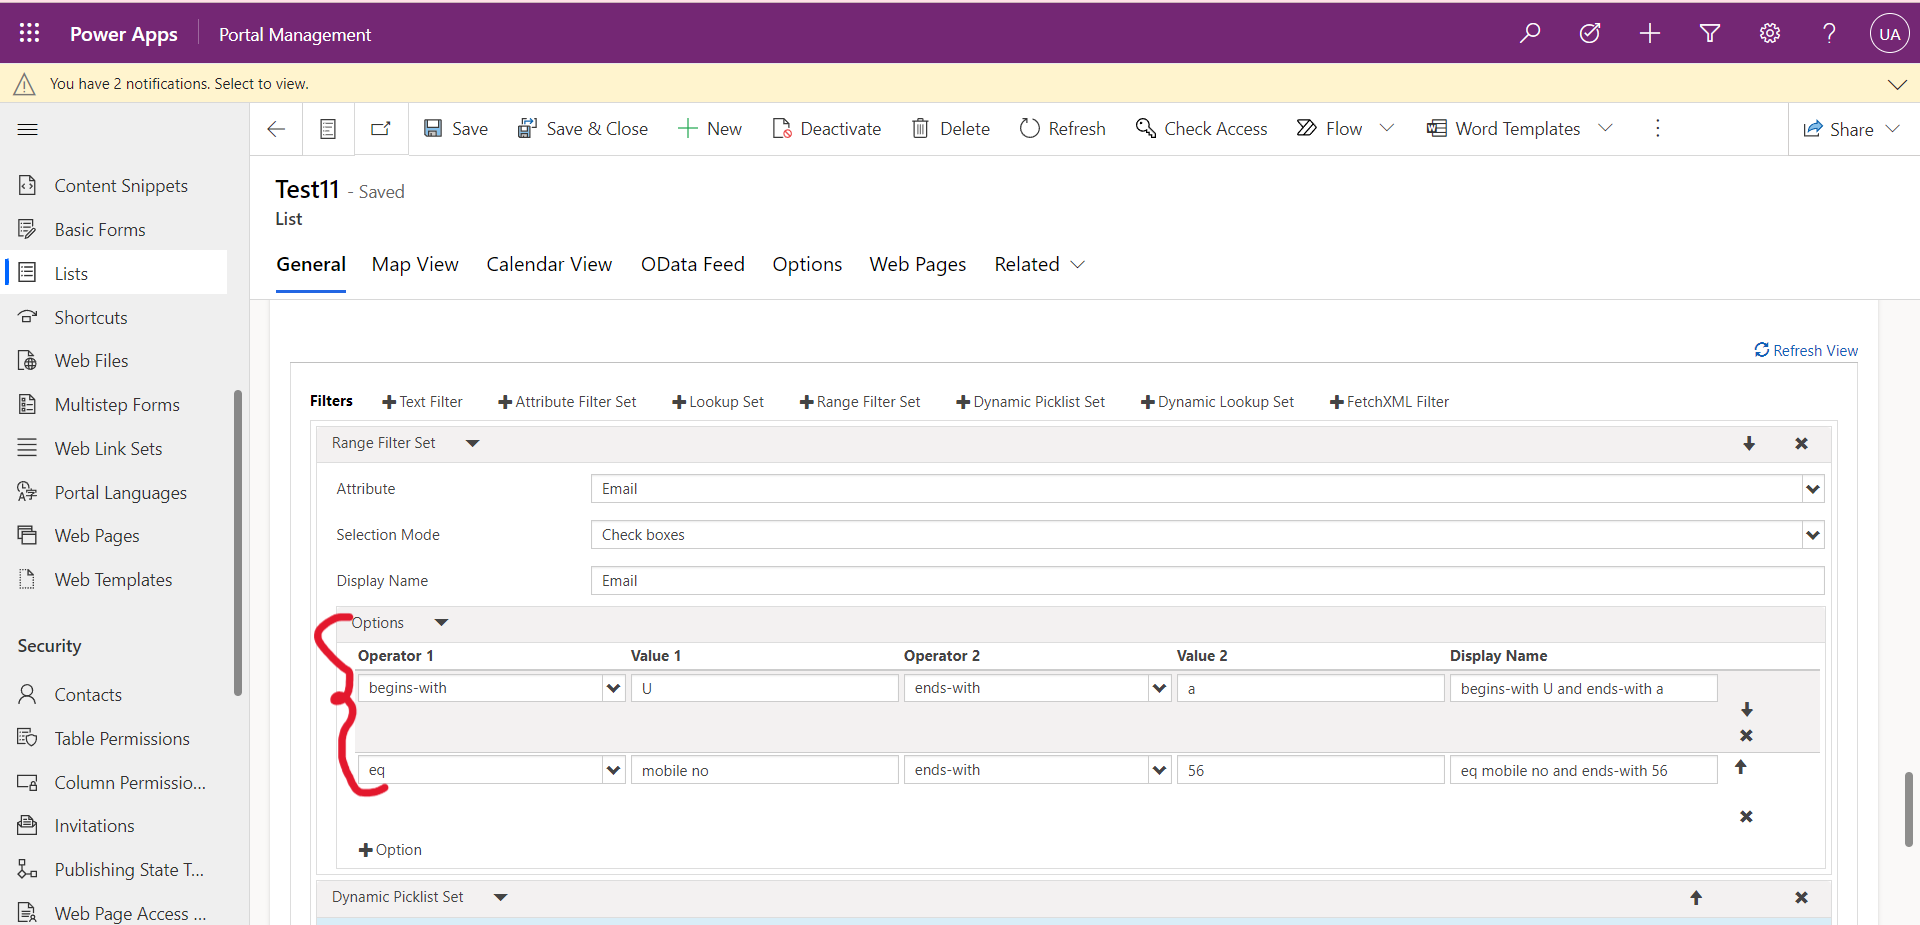
5.Next Select Range Filter Set,Enter the below details:
- Attribute:Select your Attribute name.
- Selection Mode:Select your selection mode like radio buttons,check boxes,Drop Down.
- Display name:Enter your Display name.
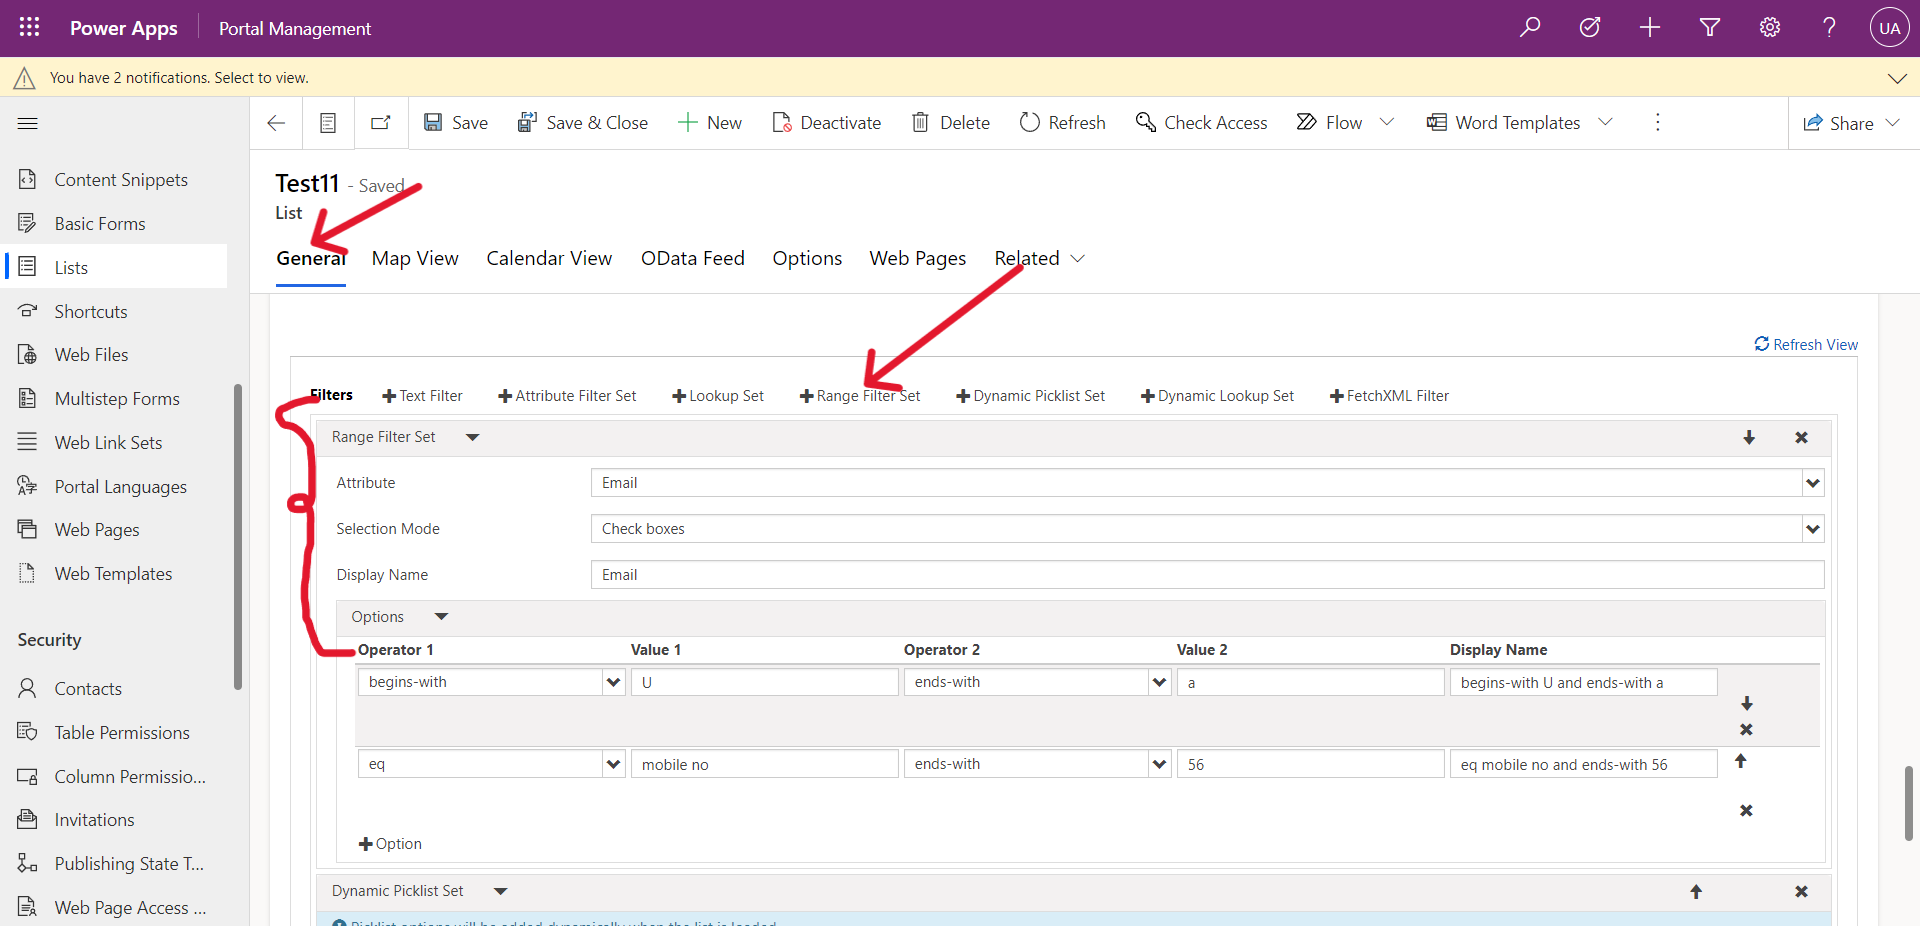
5.Next,In Options add your condition by Using these conditions user can filter the records in Portal.
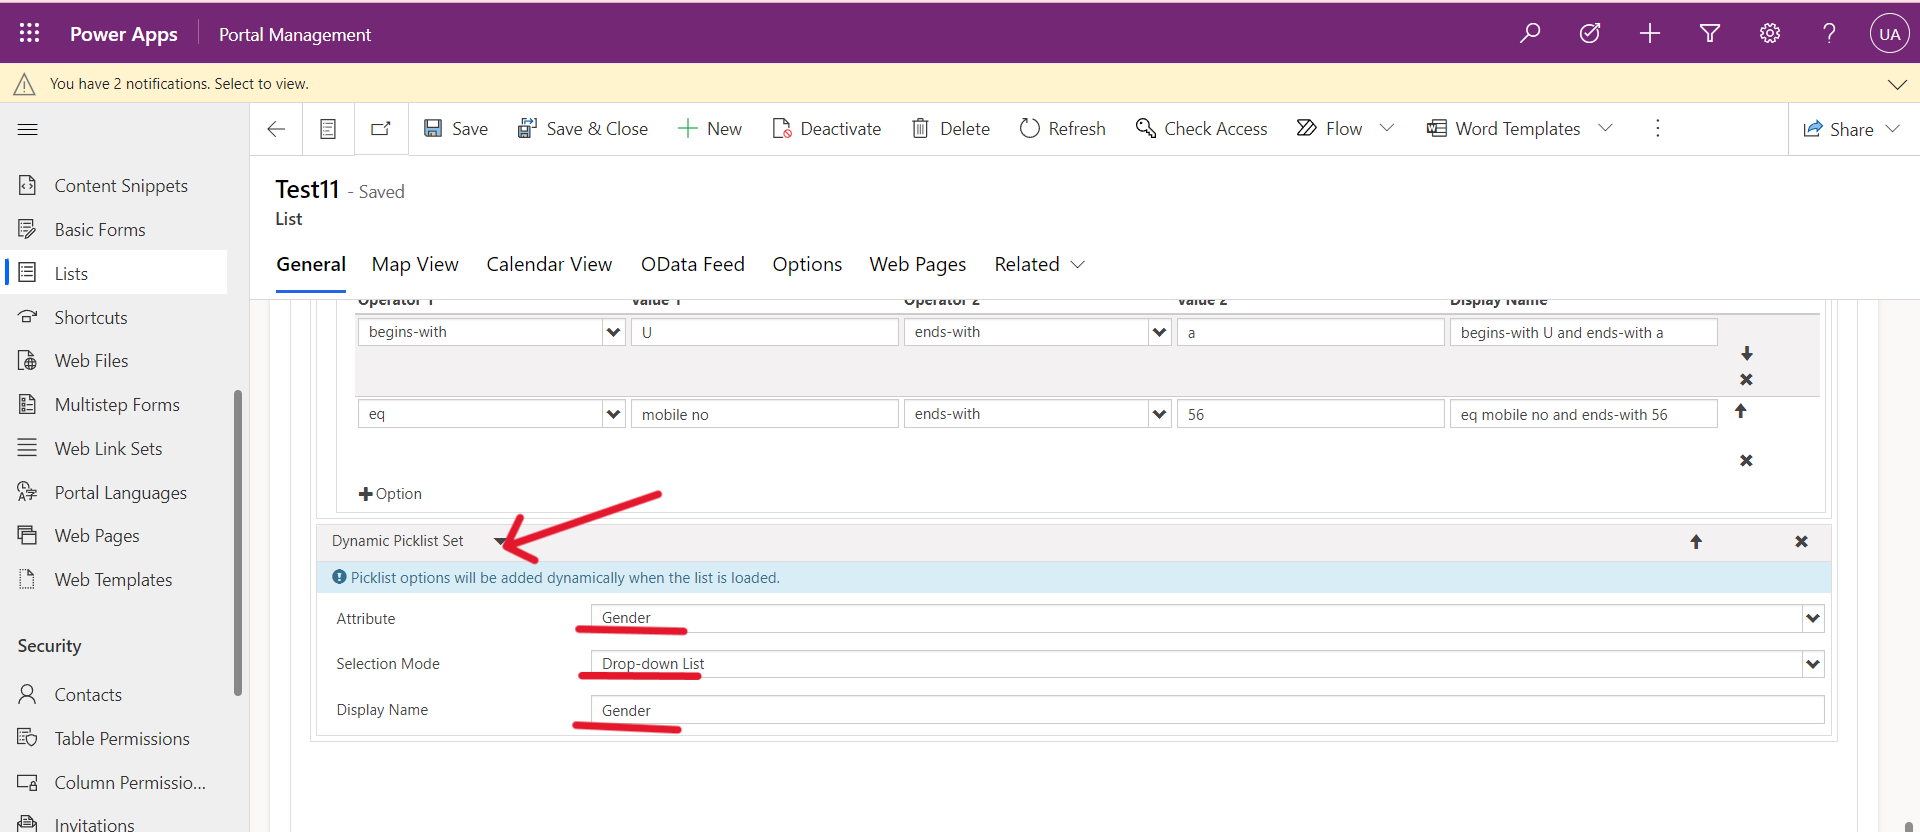
Filter the list by using the selected option set(choice) column value. Click on Dynamic Picklist Set to add this filter.
Next, select the Attribute,Selection mode and Display mode.
Next Save the list.
6.Now save and sync configuration and reload the Portal page.
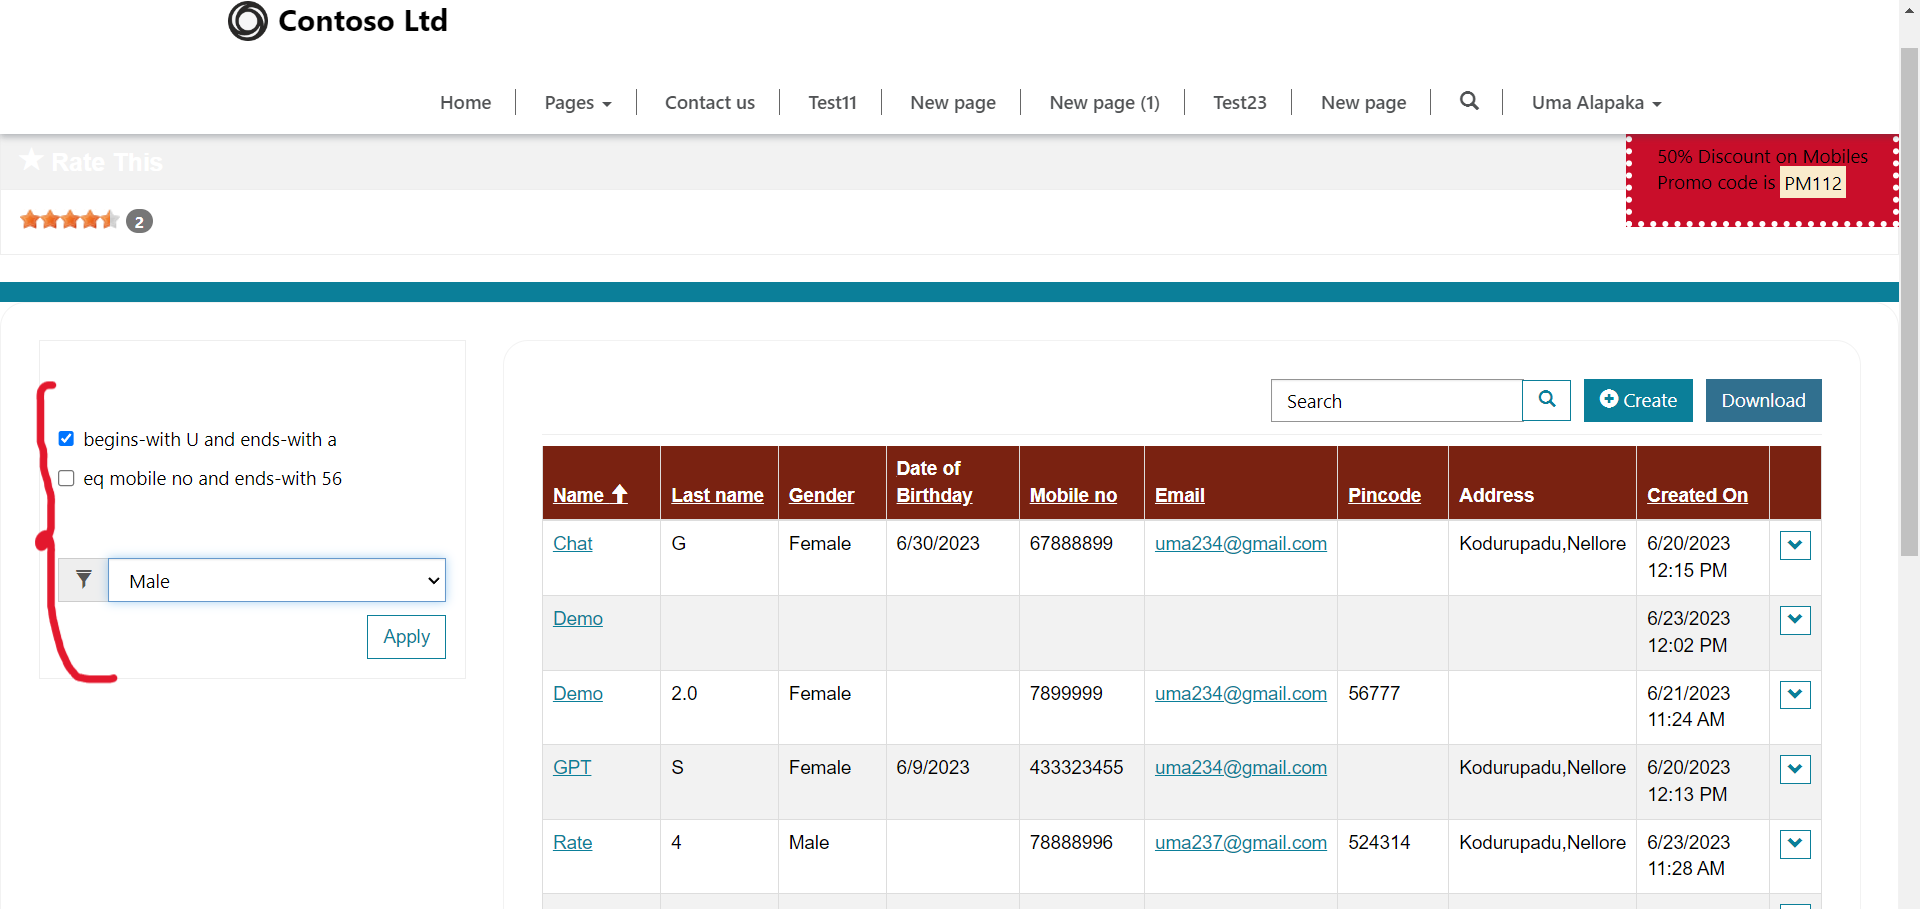
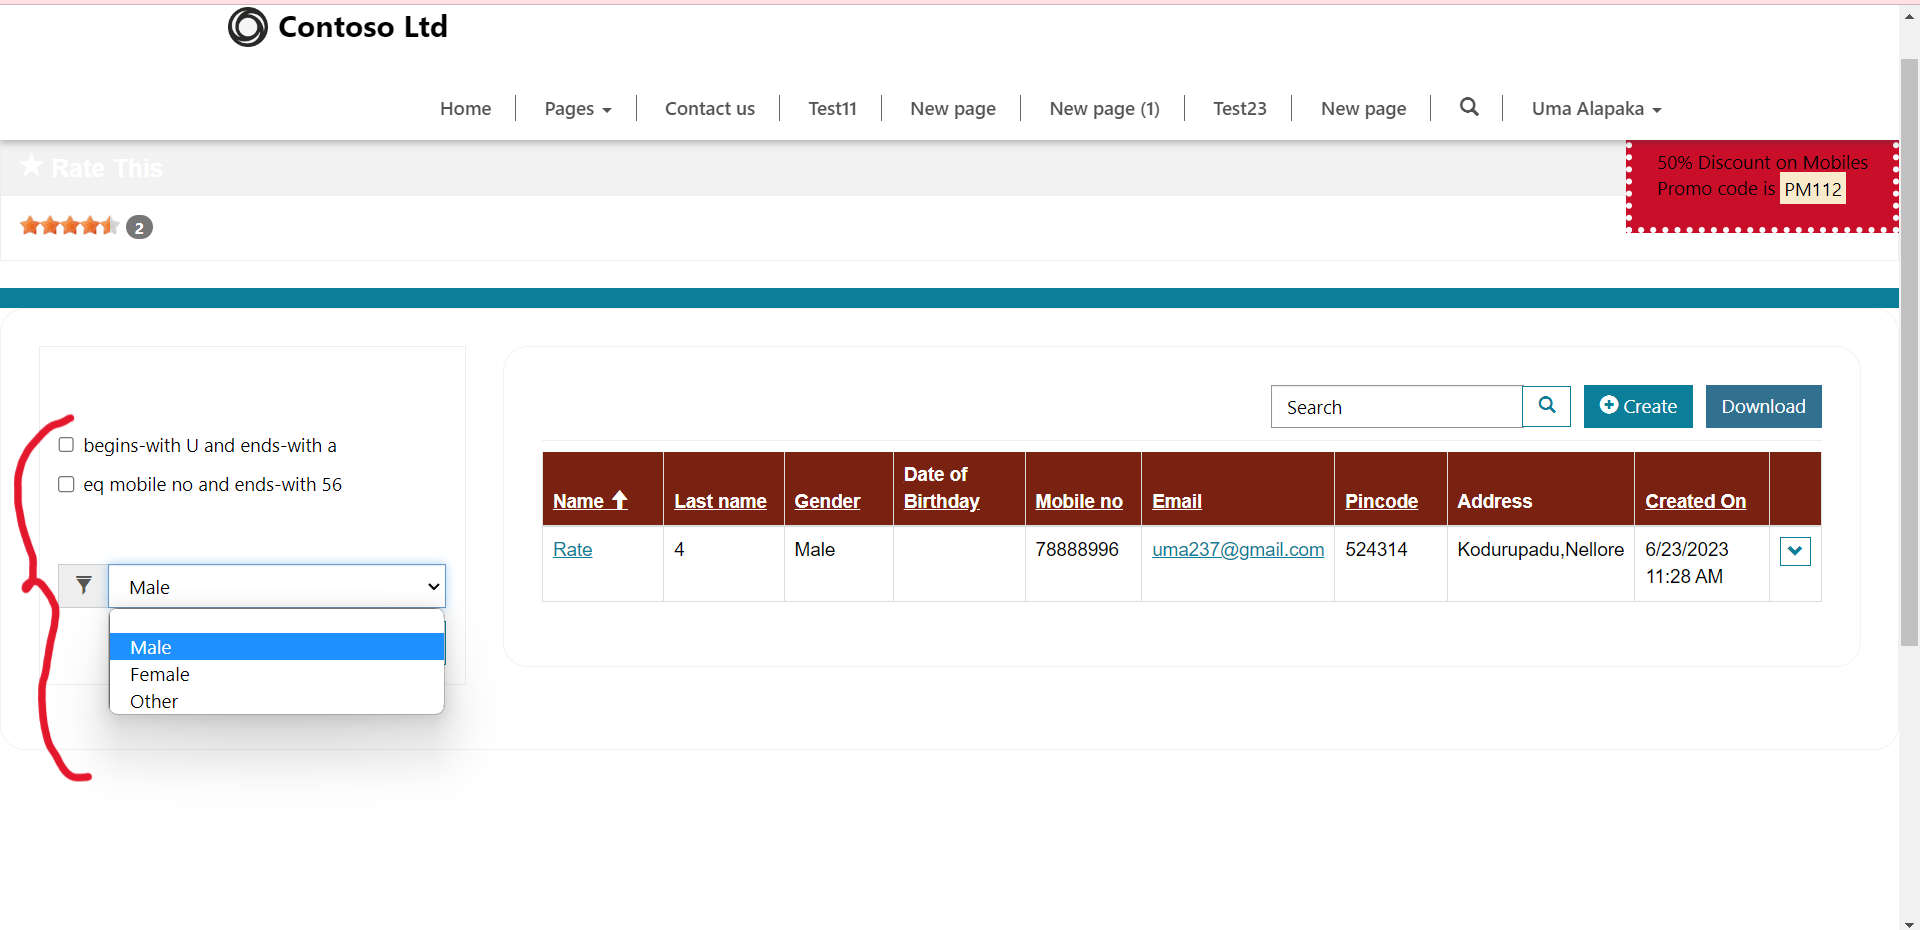
It’s look like the below page.
Hope this helpful!
https://www.crmonce.com/automatically-creates-pass-workers-status-approved/
For any Help or Queries Contact us on info@crmonce.com or +918096556344.

