To create a new portal in your environment you need to proceed as follows.
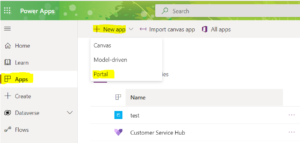
Select “Apps” from the Power Apps Maker portal’s menu (please refer to the picture below). After that, select the “Portal” app type by clicking on “New app.” Verify that you are working in the appropriate setting. As indicated by the highlights in the image below, you can verify it on the page.
Please be aware that each type of portal and each language can only have one portal in an environment.
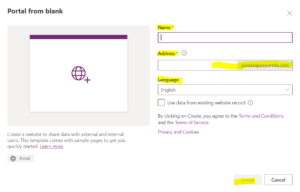
Following your click on Portal, you will be prompted to enter the following details:
![]() a portal’s title
a portal’s title![]() Your portal name.powerappsportals.com would be the format for the portal address.
Your portal name.powerappsportals.com would be the format for the portal address.![]() Language used on the portal
Language used on the portal
If you didn’t already construct or have an environment, you also have the option to do so at this stage.
The only portal template available when creating a portal in a fresh environment (which in our case does not have any customer engagement apps) is the portal from blank.
The only portal you can create in a new environment (which, in our case, does not contain any customer engagement apps) is the so-called “starter” portal. When building a new portal, one can select from a variety of portal templates. The installed apps in the environment where you create your portal determine whether or not there are any portal templates available. In contrast to an environment with customer engagement apps (such as Dynamics 365 Sales, Dynamics 365 Customer Service, Dynamics 365 Field Service, Dynamics 365 Marketing, or Dynamics 365 Project Service Automation), a brand-new environment would only provide you with the “starter” portal template. I won’t go into the specifics of the various portal template types; instead, I’ll demonstrate how to build a portal using one of the most widely used portal templates.
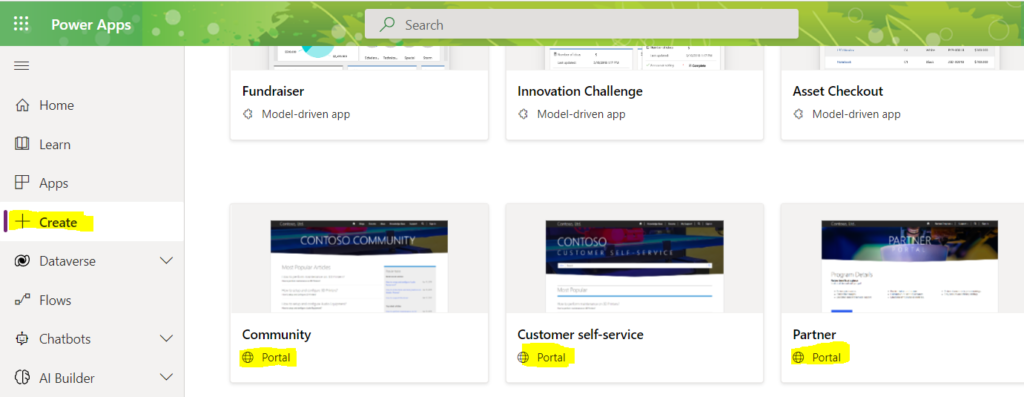
The process is very simple: open the Power Apps maker portal and select “Create” from the left-hand navigation menu. As shown in the image below, you will receive a list of all the available Portal templates. All you have to do is choose the template you want to create. It will take some time for the portal to be configured.
The most popular portal templates are listed in brief below. Please visit the following official Microsoft link for a detailed description of the portal templates and their features.
![]() Customers can access self-service knowledge, support materials, track the status of their cases, and offer feedback through a customer self-service portal.
Customers can access self-service knowledge, support materials, track the status of their cases, and offer feedback through a customer self-service portal.![]() Partner portal: A partner portal enables real-time access to all phases of shared activities for any organisation that has resellers, distributors, suppliers, or partners.
Partner portal: A partner portal enables real-time access to all phases of shared activities for any organisation that has resellers, distributors, suppliers, or partners.![]() Employee self-service portal: By streamlining routine tasks and giving every employee access to a reliable knowledge base, an employee self-service portal develops a productive and knowledgeable workforce.
Employee self-service portal: By streamlining routine tasks and giving every employee access to a reliable knowledge base, an employee self-service portal develops a productive and knowledgeable workforce.
![]() Community portal: A community portal uses peer-to-peer interactions between users and experts to naturally expand the library of information from blogs, forums, and knowledge base articles while also collecting feedback from users through comments and ratings.
Community portal: A community portal uses peer-to-peer interactions between users and experts to naturally expand the library of information from blogs, forums, and knowledge base articles while also collecting feedback from users through comments and ratings.![]() Using a blank portal To share data with internal and external users, create a website. To help you get going right away, this template includes sample pages.
Using a blank portal To share data with internal and external users, create a website. To help you get going right away, this template includes sample pages.![]() Customer Portal (An Early Look): An externally facing B2B order placement website is provided by a supply chain management customer portal template. Utilizing the associated Dynamics 365 for Supply Chain Management environment, this template enables external users to create and view orders. Please be aware that the Customer Portal template is still in the preview stage right now.
Customer Portal (An Early Look): An externally facing B2B order placement website is provided by a supply chain management customer portal template. Utilizing the associated Dynamics 365 for Supply Chain Management environment, this template enables external users to create and view orders. Please be aware that the Customer Portal template is still in the preview stage right now.