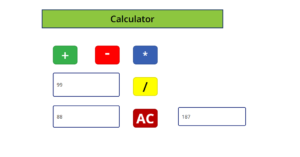
Using the PowerApps Canvas programme, I made the simple calculator you see in the screenshot below. With the use of many operators, including addition (+), subtraction (-), multiplication (*), and division (/), this PowerApps calculator can calculate any number.
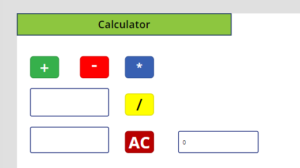
Similarly, you can click on the AC button as shown below to reset the entered digits.
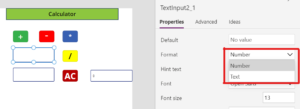
Select the First Number Text input box after that, then format the field value as a number (go to Properties -> Format -> Select Number).
Similar to the screenshot below, choose the Second Number Text input box and format the field value as a Number.
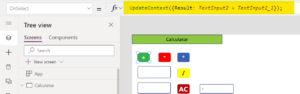
Next we must add a formula to each button’s onselect property.
On ‘+‘ = UpdateContext({Result: textInput1 + textInput2 });
On ‘–‘ = UpdateContext({Result: textInput1 – textInput2 });
On ‘*‘ = UpdateContext({Result: textInput1 * textInput2 });
On ‘/‘ = UpdateContext({Result: textInput1 / textInput2 });
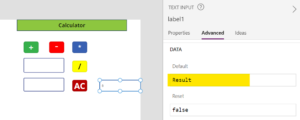
Set the label’s text property with the result of clicking on it. You can also change its display properties.
Next Save and Run the app.
Now Test the app