Creating Custom Connector
Go to https://make.powerautomate.com → Data → Custom Connector.
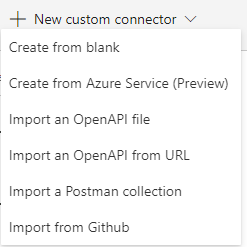
Click on the + New Custom Connector and select Create from blank from the list.
Add a relevant name to the connector and hit the continue button.
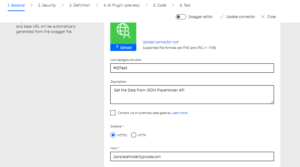
It will navigate you to the General section of the custom connector page. There fill the necessary fields like description, scheme, host, and base as like the below image.
Then click on the security button in the bottom. It will take you to the Security Page. Select No Authentication for Authentication Type (Note: As the JSON Placeholder API doesn’t need any authentication). If the API that you have used needs Authentication, you need to select any other suitable Authentication. Then click on the Definition.

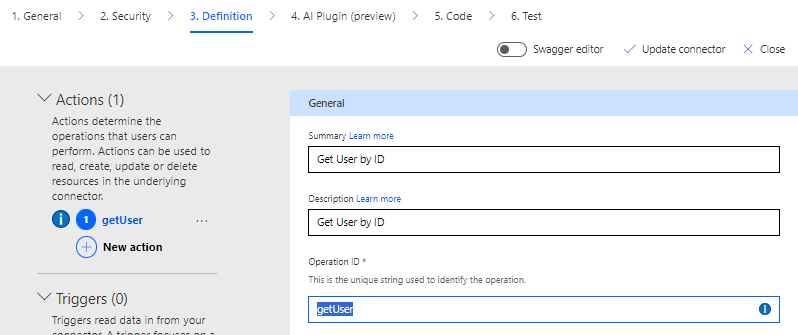
In the Definition page, click on the + New Action under the Actions section on the left.

A form opens with some inputs in the right. Add Summary, Description, and Operation ID.
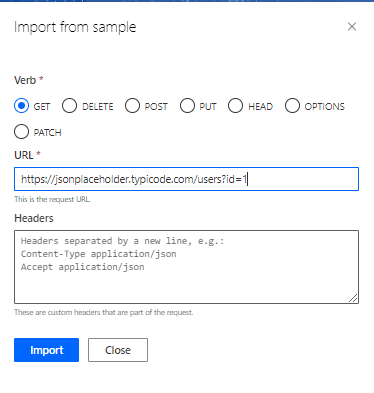
Scroll a little bit and move to the request section and click on + Import from sample.
Select the verb as GET and add https://jsonplaceholder.typicode.com/users?id=1 to the URL.
The request got added to the connector with the query. Move to the response section.
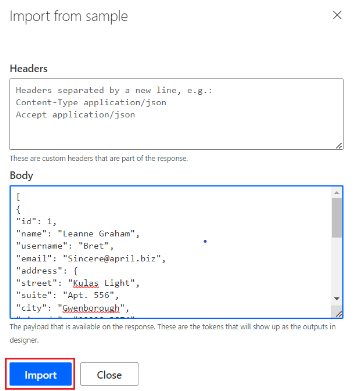
Paste the same URL (https://jsonplaceholder.typicode.com/users?id=1) in the browser and copy the response JSON.
Click on the + Add default response and paste the copied response to the body and click on import.
Click on code. In the code page, as our connector doesn’t need code, so skip and click on Create Connector on the Top menu bar.
Move to the Test section and create a new connection if not created. In the Operations section. Add id as 1 and click on Test Operation.

Use Custom Connector in Flow
Go to the solution and navigate to + New → Automation → Cloud Flow → Instant.
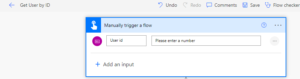
Add a relevant name and select Manually trigger a flow as a trigger. Add a number input for passing user id
Add a new step and navigate to custom, you’ll get to see the connector you created.

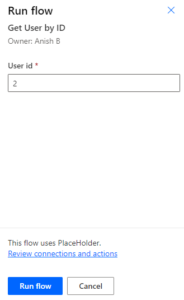
Click on the Custom connector, and you will see the action you created. Save and Run
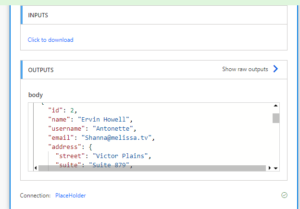
The flow ran successfully and when we check the response from the run history of the custom connector looks like the below image.