The procedure must be followed in order to establish an entity list for creating, editing, and viewing entity form records.
Open the Portal Management in the Power apps .

Step 1 : Create a Web Template
In order to start, we must first establish a web template with the “Name” and “Website” fields.
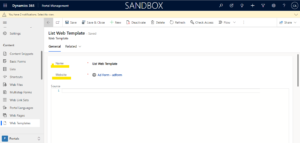
We just generated a blank web template, which we can later use to insert liquid code into when we make a list.
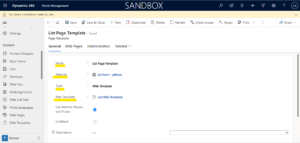
Step 2 : Create a Page Template
In order to create a page template, all necessary fields must be filled in.
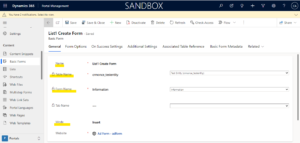
Step 3 : Create Three (3) Basic Forms
This process involves developing three (3) fundamental forms: create, edit, and read-only.
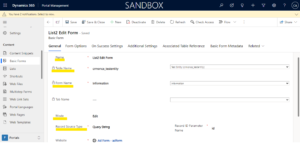
3.1 . List1 Create Form
The “Mode” field is crucial when building a simple form. We selected “Insert” as the mode for this form. for constructing the entity form’s entity list.
3.2 List2 Edit Form
For editing the already-existing data in the entity list, we must switch the mode to “Edit”.
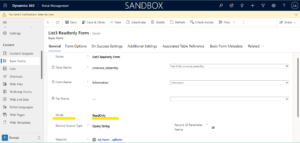
3.3 List3 Readonly Form
We must now switch the mode to Readonly for View the record’s details in the entity form.
Therefore, we produced the three fundamental formats for the lists. Now, we must make a list.
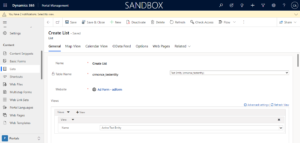
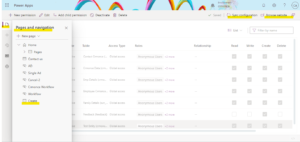
Step 4 : Create a Entity List
Now we have an entity list called “Create List” that we have built.
The Required fields in the General Tab must be filled in, and then there are options to build Buttons in the Options Tab.
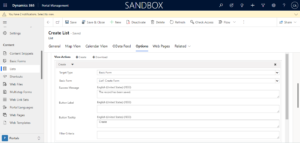
the Create Button like Similar buttons were made for Edit, Read-Only, and Delete.
Therefore, once the list has been created, we must add liquid code to the web template

// Web Template liquid code for entity list
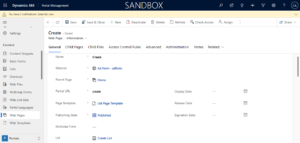
Step 5: Create a Web Page
After the list, we must develop a web page that can be viewed through the portal.
We simply created a web page called “Create” and filled it with all the necessary information.
Step 6: Create table Permissions
Open the power apps and set the table permissions as displayed in the picture below.
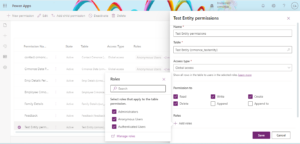
These table permissions are based on your requirements as to which rows should have administrator and which rows should have authenticated row-level permissions.
After completing all processes, we open the advertisement form. At this point, the website is initially concealed; we must unhide it.
Now sync and Browse the data
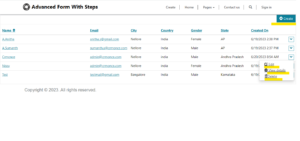
We need to view each functionality now that the Create, Edit, View Details, and Delete buttons are there.
First we go for Create
The “create” page will open when we click it, allowing us to fill in the information and save the record.
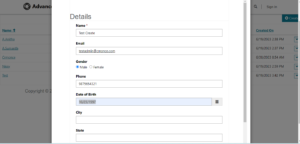
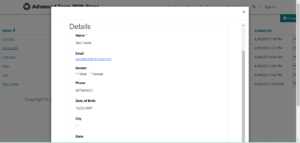
We go to view the details in order to do so.
similarly The ability to edit and delete will function.
In a similar manner, we can configure an entity list for creating, editing, and reading details.