
What is Workflow in Dynamics 365..?
A Workflow in Dynamics 365 is a process which defines series of Functions or Methods, called Steps which are Operated sequentially.
The Workflow can change the processing direction by using conditionals.referred to as conditional branches .
A Workflow is an pro efficient tool for managing both data and processes.
We have to stick to the procedure in order to construct a workflow in the power apps portals.
Therefore, before we have access to the process in portals, we must first establish a workflow in dynamics.
Login to Dynamics 365 –Settings —Solutions As Shown in Below Picture.
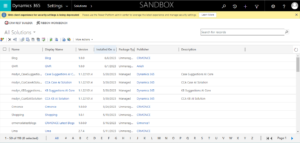
Choose any solution from which you wish to run a workflow.
I choose Solution “Crmonce” and One Entity “Test Entity” as my starting points.
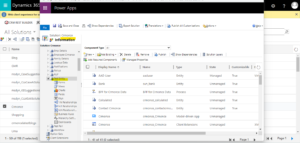
Therefore, some fields with various data types were generated in that entity and added to the form.
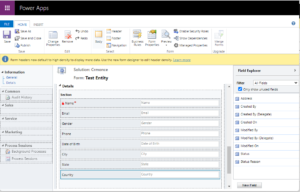
To see the results, we must add this object to the model-driven app after placing the fields in the form.
Save and publish the entity after you’ve added it to the site map.
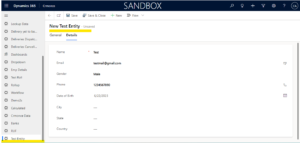
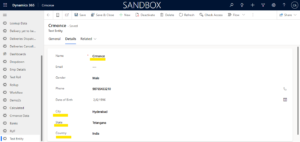
The output page will display once publishing is complete. Provide the data and save it.
Now, utilising these fields, we must design the work flow for this.
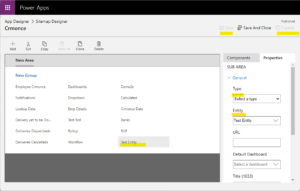
Goto the solution –Process .
Thus, you must use the Workflow Category to build the new process.
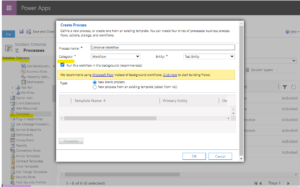
The next screen will show up once you click “OK” to let you choose the workflow condition.
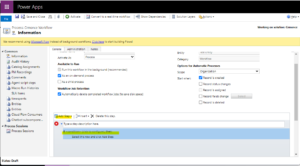
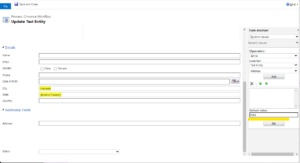
Therefore, we need to design two steps: one for the condition and one for updating the record in accordance with the condition.
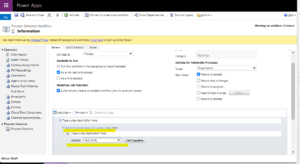
As seen in the picture below, we must set properties in accordance with the answer.
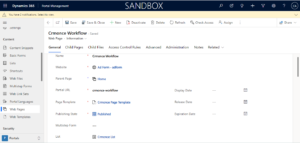
Once the workflow has been saved and activated, the flow will appear in the portal under the name that we specified “Crmonce workflow”.
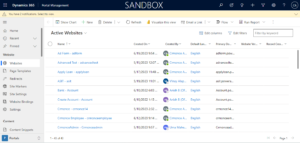
Open the Power Apps and then choose the website portal you wish to use to view the results under Power Apps.
To view the management of the Portal, click View More Settings. On the screen will be information such as lists, web templates, page templates, web sites, and more.
To view the lists, we must first create a “Web Template” and enter liquid code into it.
In order to understand the liquid code in the site template, we must input the code after the list is generated.
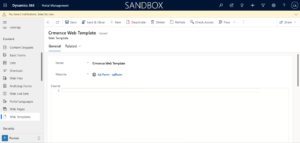
Save the web template with the necessary information.
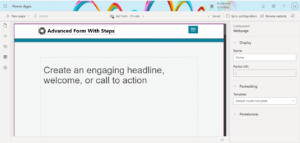
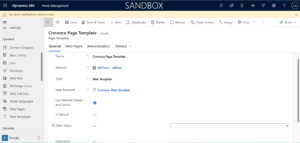
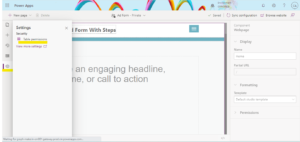
We must construct a page template after creating the web template and Complete all needed fields.
In the portal management, a list must be created to see the workflow.
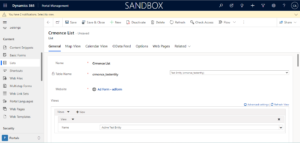
Two tabs, one labelled General and the other Options, should include the details for the list.
To establish a workflow, we must now fill out the Options Tab.
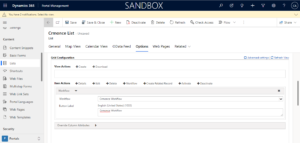
The workflow that we created in the dynamics is immediately taken when we click on it.
In order to examine the list and workflow, we must first develop the web page.So, fill one web page with the necessary information.
Go to the web template for the liquid code now, open it, and enter the following code.
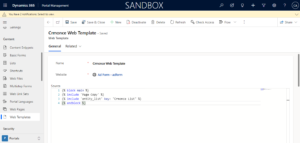
//Web Template liquid code for list visibility in the portal page
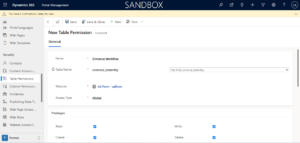
Finally, we must grant the web page’s table permissions in the power apps.
The web roles must be provided as well; else, the page will not function.
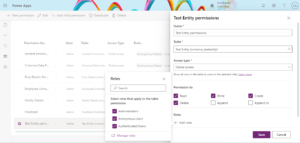
Another option is to grant the table permissions via the portals, as seen in the image.
Now that the workflow in the portals has gone through all the necessary steps, you may view the workflow.
The web page will display when you open the power apps, open the pages, and go from there. It will initially be hidden, so you’ll need to unhide it before you can see it. Next, press Sync Configuration to go immediately to the web page when you browse the website.
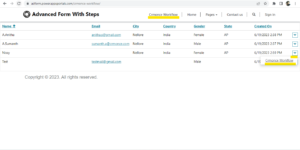
Now we need to check the workflow with the condition that the process has the criteria “if email contains data then the city, state, and country fields will be changed,”
We now need to create a record in Dynamics without an email and check the fields for the city, state, and country.
Watch what happens when we click the Crmonce Workflow button.
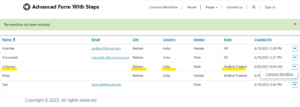
So we created a new record with different city ,state and country so these fields automatically changed because of the workflow .

Now, the result is visible when we click the CRMonce workflow.
We receive the outcome by using the power apps portals’ workflow in accordance with our needs.
In this way, we may use the portals to design workflows based on our needs.