Step 1
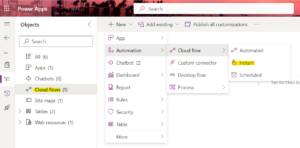
Login to the required Power Automate environment using URL make.powerautomate.com by providing the user name and password and click on Cloud Flows on the left-hand side and after chose the Instant Cloud Flow as shown in the below figure.
Login to the required Power Automate environment using URL make.powerautomate.com by providing the user name and password and click on Cloud Flows on the left-hand side and after chose the Instant Cloud Flow as shown in the below figure.
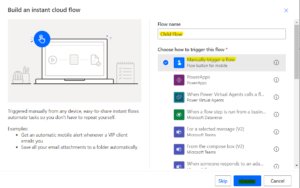
Step 2
After step 1, click on the trigger as Manually trigger a flow, and Give the Flow Name Then click on Create as shown in the bellow figure.
After step 1, click on the trigger as Manually trigger a flow, and Give the Flow Name Then click on Create as shown in the bellow figure.
Step 3
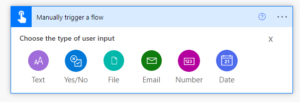
After step 2, Navigate to the flow, click on ‘Add an input’ as show in the bellow figure.
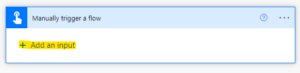
Add the “Input Parameter”
After step 2, Navigate to the flow, click on ‘Add an input’ as show in the bellow figure.
Add the “Input Parameter”
Step 4
After step 3, Add your logic
Step 5
After step 3, In order for the flow to be reused in another flow It must send a conclusive response and is triggered by the action listed below.
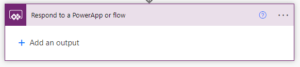
The output of the flow also should define its type and follows the same types of input parameters have.
After step 3, Add your logic
Step 5
After step 3, In order for the flow to be reused in another flow It must send a conclusive response and is triggered by the action listed below.
The output of the flow also should define its type and follows the same types of input parameters have.
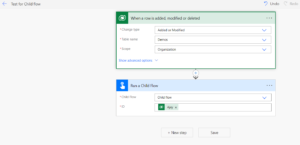
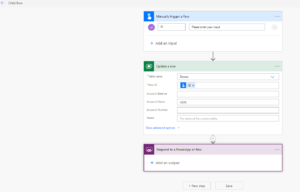
The final flow is as show in below figure.
I am calling this flow into another flow. Use the action “Run a child flow” and select the action.
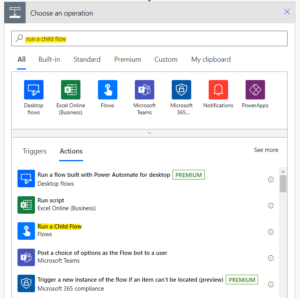
After chose the which flow you want.
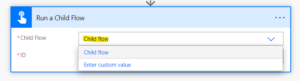
After chose the which flow you want.
The final flow is as show in below figure.