Step-1:-
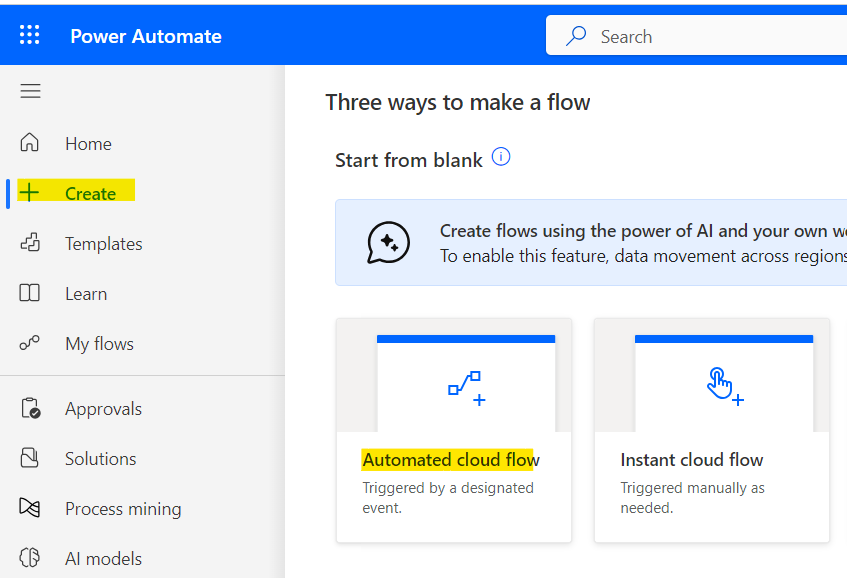
In Power Automate, click on the +Create option from the navigation -> select Automated Cloud Flow.
Step-2:-
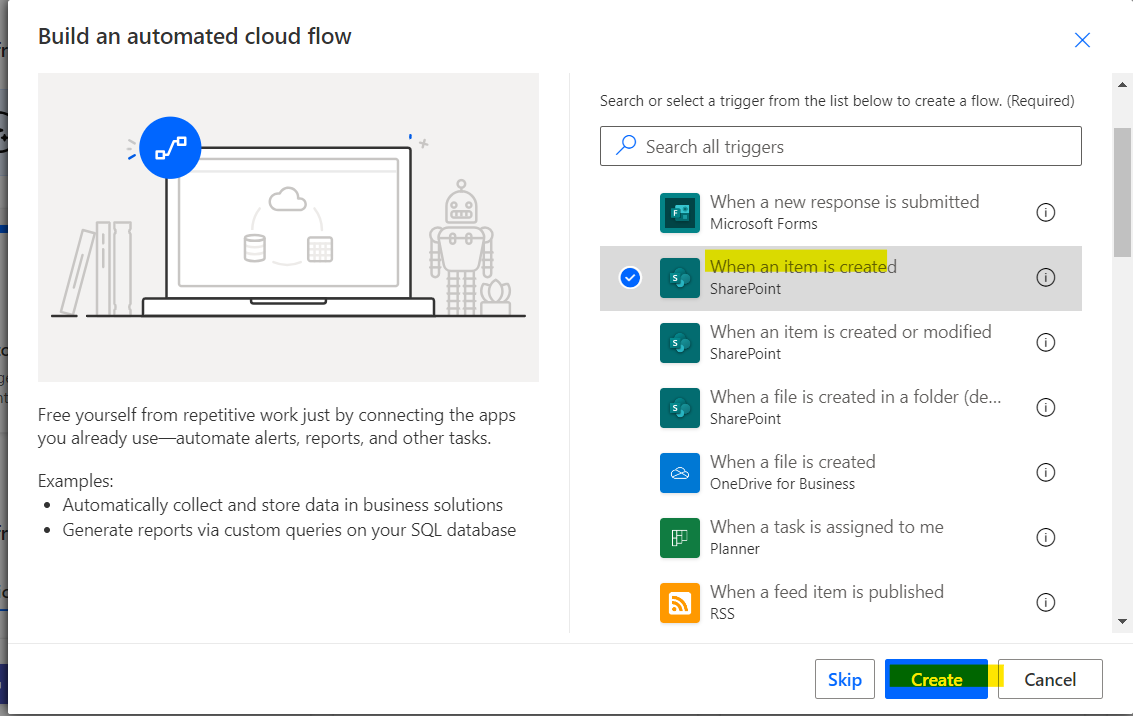
Then Build an Automated Cloud Flow window will open, here provide the Flow name, and select the trigger ‘When an item is created‘(SharePoint) from the list of triggers. Click on Create.
Step-3:-
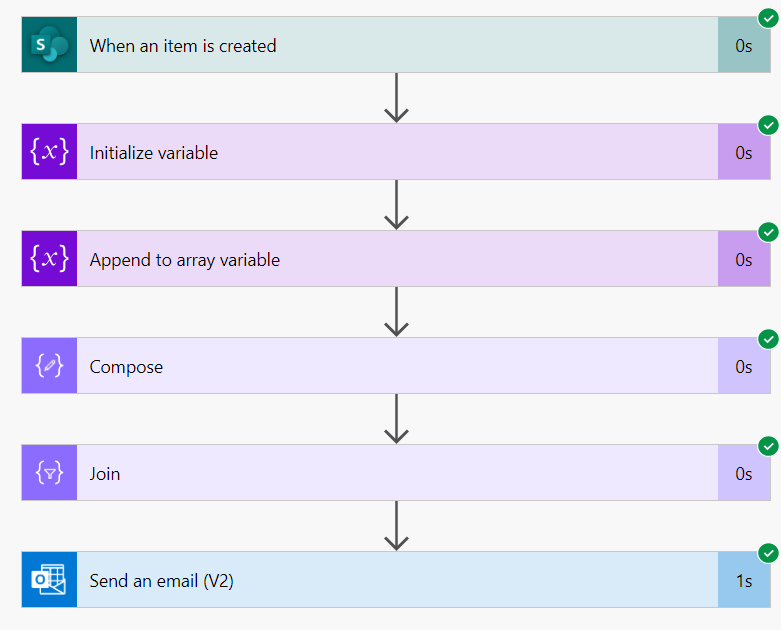
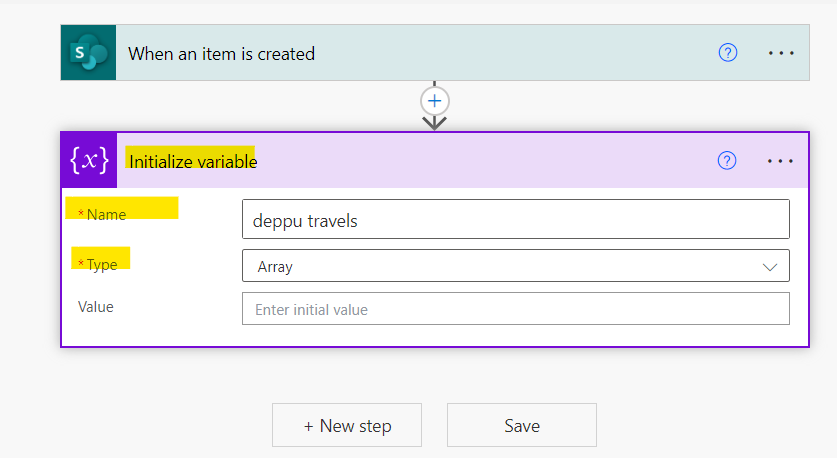
click on ‘+New Step‘ option, select Initialize variable option, and then provide the name of the variable, and select the Type as ‘Array‘.
Step-4:-
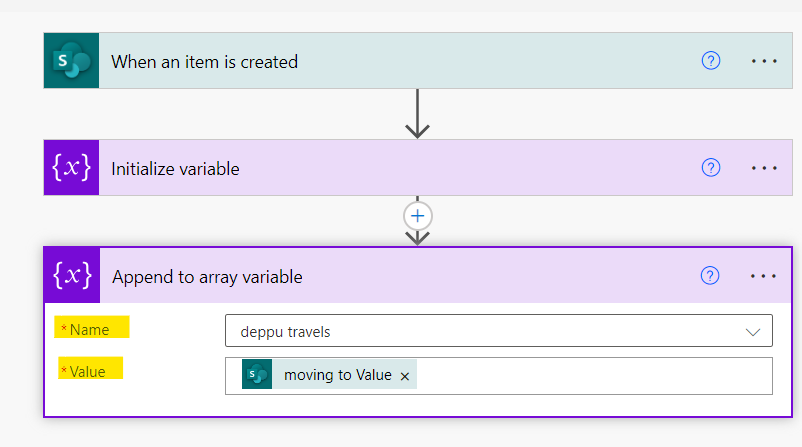
Then click on ‘+ New Step’, and choose an action as ‘Append to array variable‘. Provide the Name from the dropdown, and Select ‘MovingTo Value’ from the dynamic content
Step-5:-
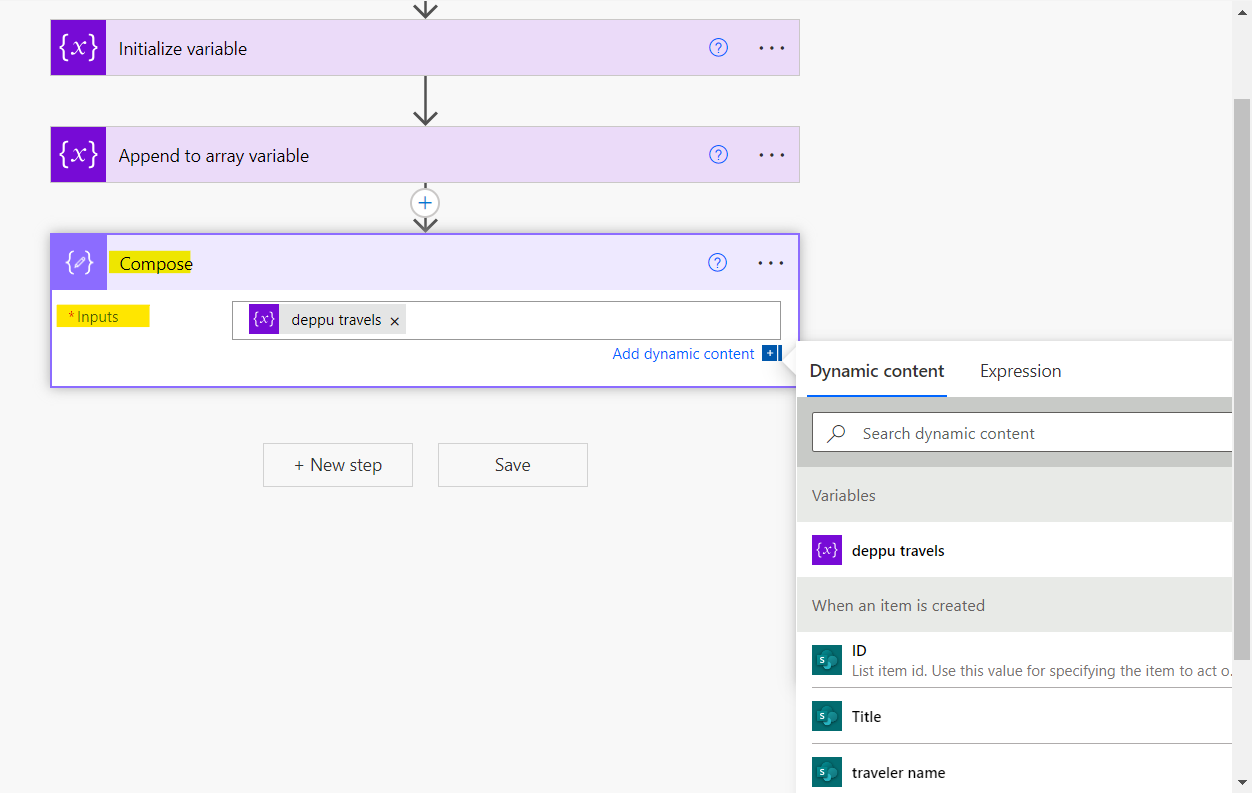
click on the ‘+New Step‘. Select the ‘Compose‘ action.
Step-6:-
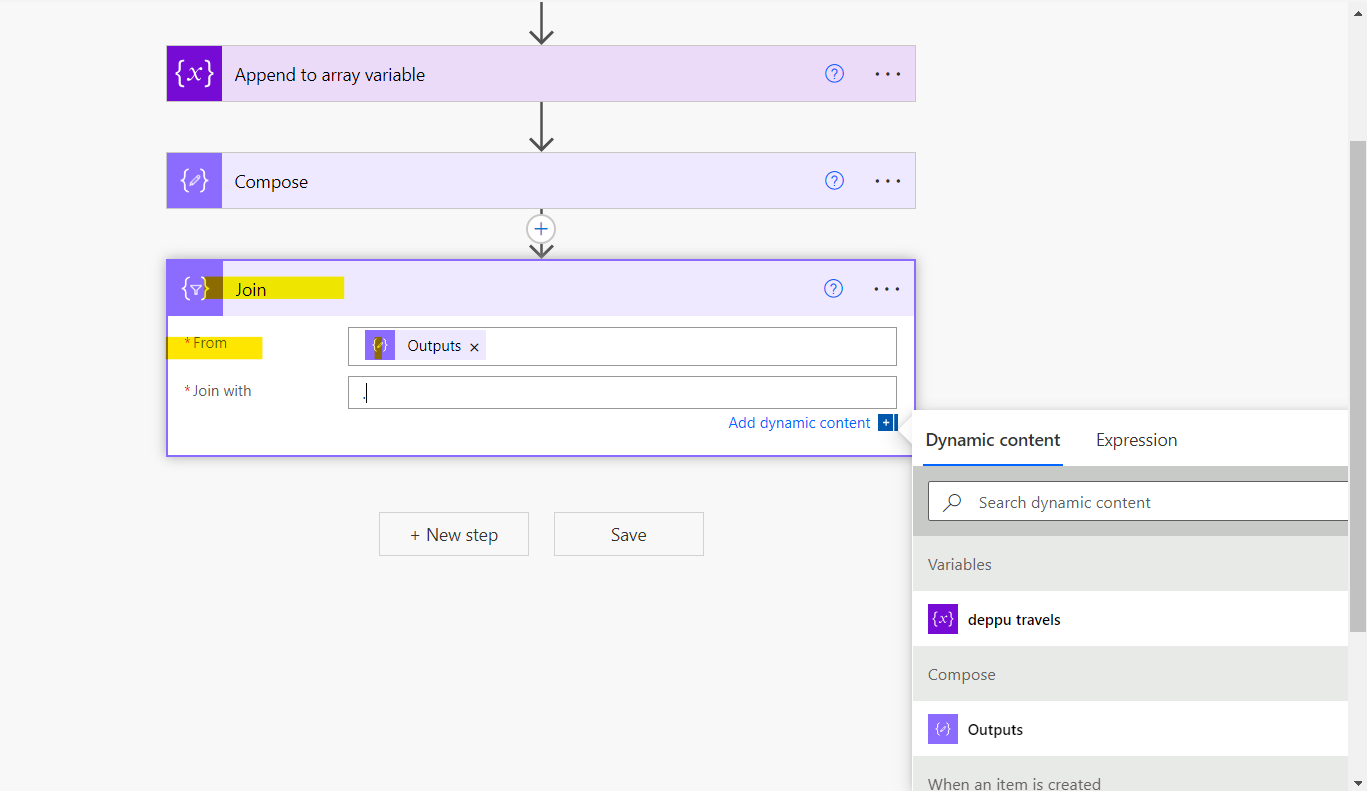
Click on ‘+New step’, then select Join action under Data operation,-> in the From field, select ‘Outputs under Compose‘
Step-7:-
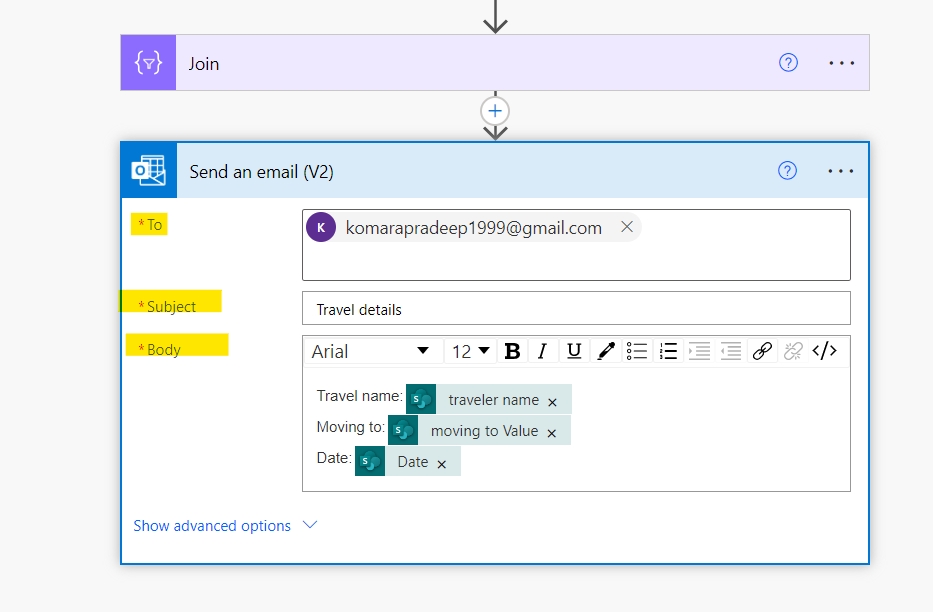
Now to send an email, click on the +New step, and select the ‘Send an email(V2)’ action.
Step-8:-
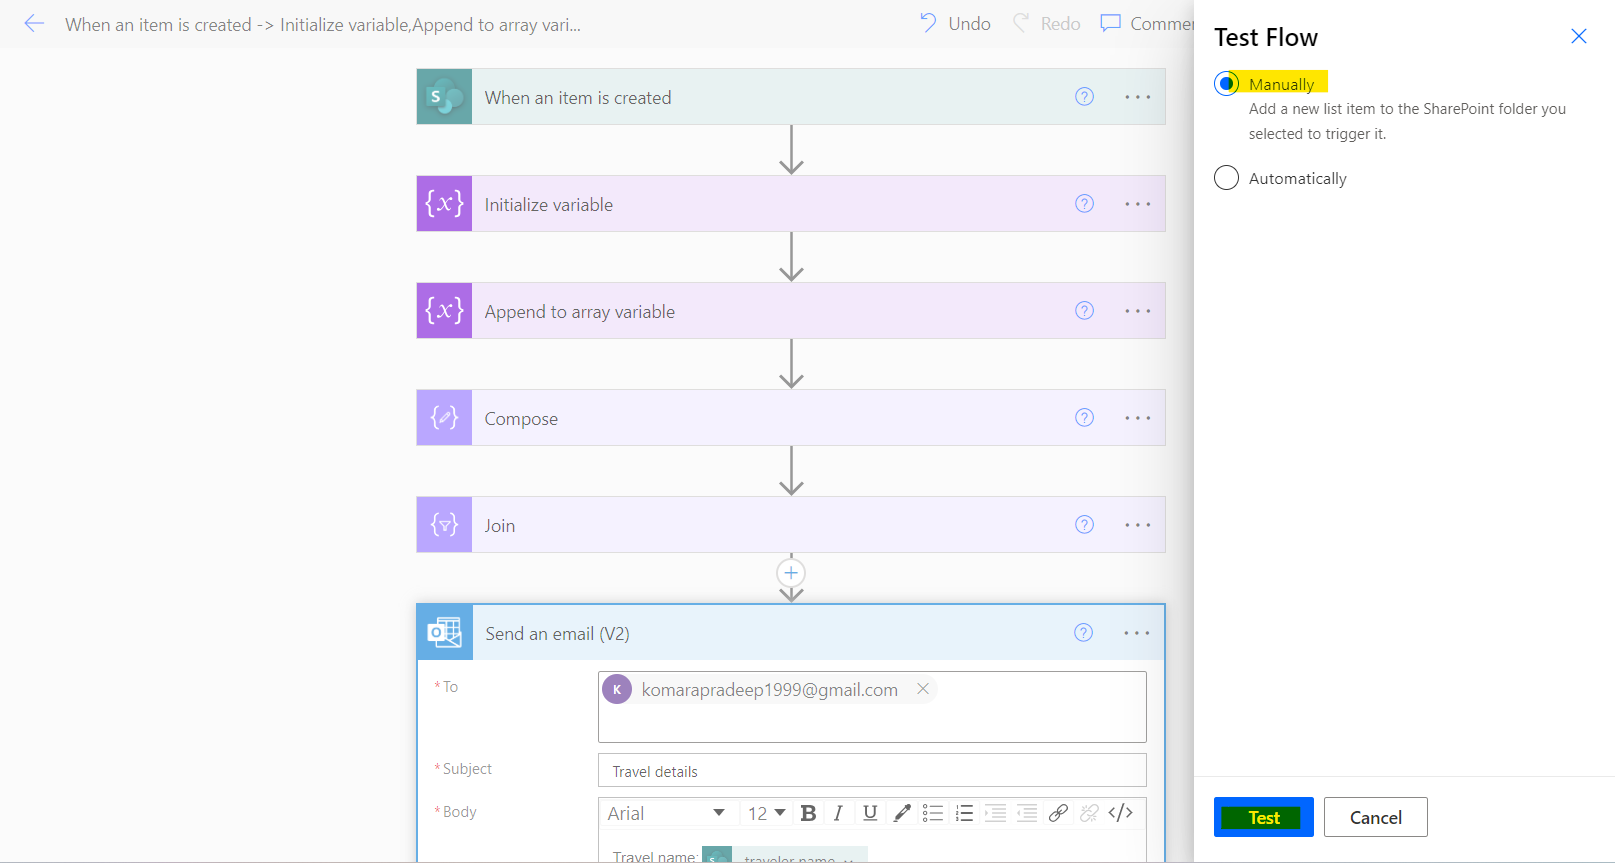
Save the Flow, click on Test -> select Manually trigger flow -> then click on the Test button.
Step-9:-
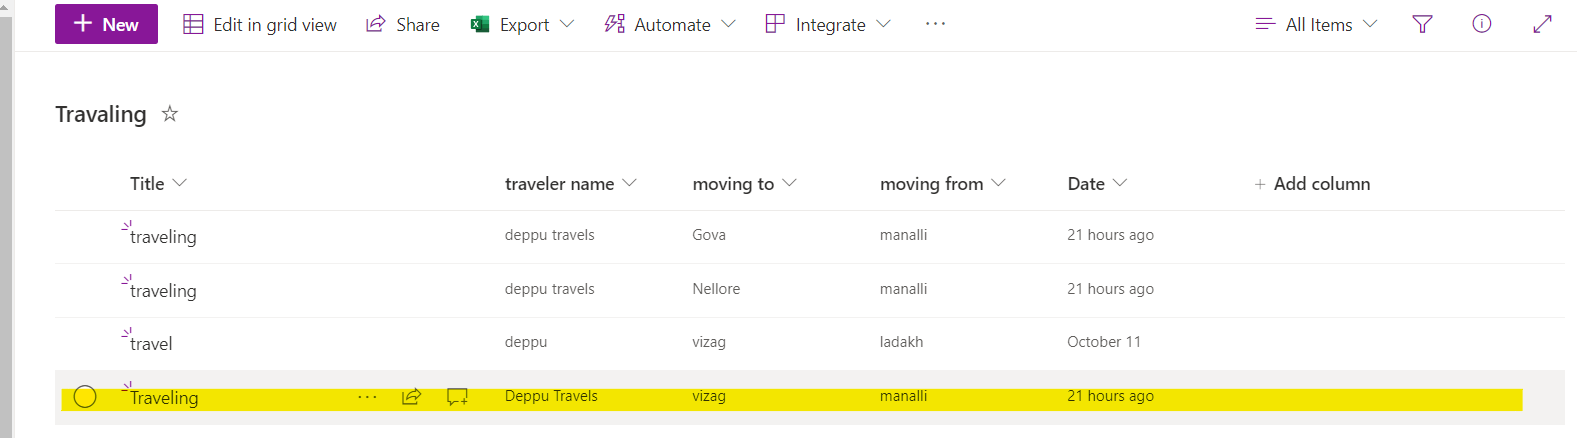
Now create an item in the SharePoint list to trigger the Flow like below.
Step-10:-
You can see flow run successfully.