Sending an email to Distribution List/Group in MS flow

In this article, I will be demonstrating how to send an email to a Distribution List (DL) or Group in MS flow.

It’s been a very common question from users if we can send emails from a DL using MS flow. I found that the process of sending out emails using flow caused a bit of confusion. Recently, I observed many questions about setting up email to help automate work. As we all know, MS flow is replacing SharePoint Designer gradually. I received a request from users who want to send an email via Flow to all members of a given SharePoint security group.

First, I would like to summarize Office 365 groups vs. distribution lists. The difference between Office 365 groups and distribution lists is that Office 365 groups are basically distribution lists with more features from the distribution group.

A distribution list enables users to send emails to all members of a group. Limitations include that it cannot be shared, the access type is not available, the document library is missing, and last but not least, it cannot be restored once deleted.

In an Office 365 Group, all features of a distribution list are available plus other enhanced features that a distribution list does not have. The most important reason to use Office 365 groups is enhancing collaboration. While distribution lists have the same purpose, Office 365 Groups go a few steps further.

We should now all be clear on distribution lists and Office 365 groups. As we are all in the migration stage from on-premises to online, a local DL allows us to convert to an Office365 group without data loss or hampering end users.

Let’s start with how to send an email to a distribution list/group in MS flow. 
  • Login to MS flow and create new instant from blank.

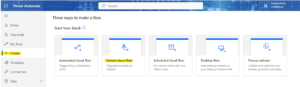
  • As soon as you select the item highlighted above, you will get an intro page for MS flow, you can select options from this page and decide the name of WF. Also, you can click on skip and change the name later.
  • In my case, I skipped the intro and selected Sharepoint down the page, see the below images and details
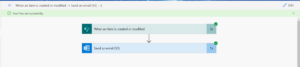
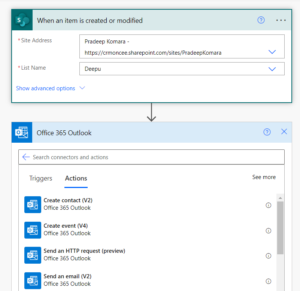
  • Select SharePoint, select item created or modified under action by targeting SP sites and List.
  • Once done, click on new actions and select “Office 365 Outlook” and “select send an email (v2)


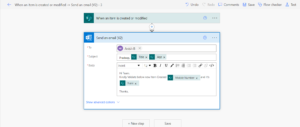
  • Now, it will prompt you to update the required info such as address, subject, body and other details which are available in advanced options (attachment and other references)
  • In ‘to address’, copy your DL email address, under subject field you can define the message you want to give to end-users
  • Under the body form, you can pass a simple or advanced message for the end-user. There are options available under MS flow actions or simple HTML will suffice.

  • After making all the changes, click on the save option.
  • Now, create any one item or modify the existing item which you targeted in the SharePoint option.
  • While creating items, you can pass the required detail and click on create.
  • Note: this action needs to be done on a SharePoint list. Browse through the site for testing. The flow will be an application to all users who have access to modify or create an item to the SPO list.
  • We can see that emails are triggered for all the users who are members of the mentioned distribution list.

  • Open Outlook for any user who is a member of this Pradeep and it can be verified if the action is working as expected. See the below email for more details.
  • In this article, we learned how to send an email from a distribution list in SharePoint using MS flow. Following the same steps, we can use the process for Office 365 Groups as well. To perform this no changes are required in the steps.

For any Help or Queries Contact us on info@crmonce.com or +918096556344