Case in Field Service CRM
A case in Field Service CRM helps track customer issues and ensures timely resolution. Follow these simple steps to create a case efficiently.
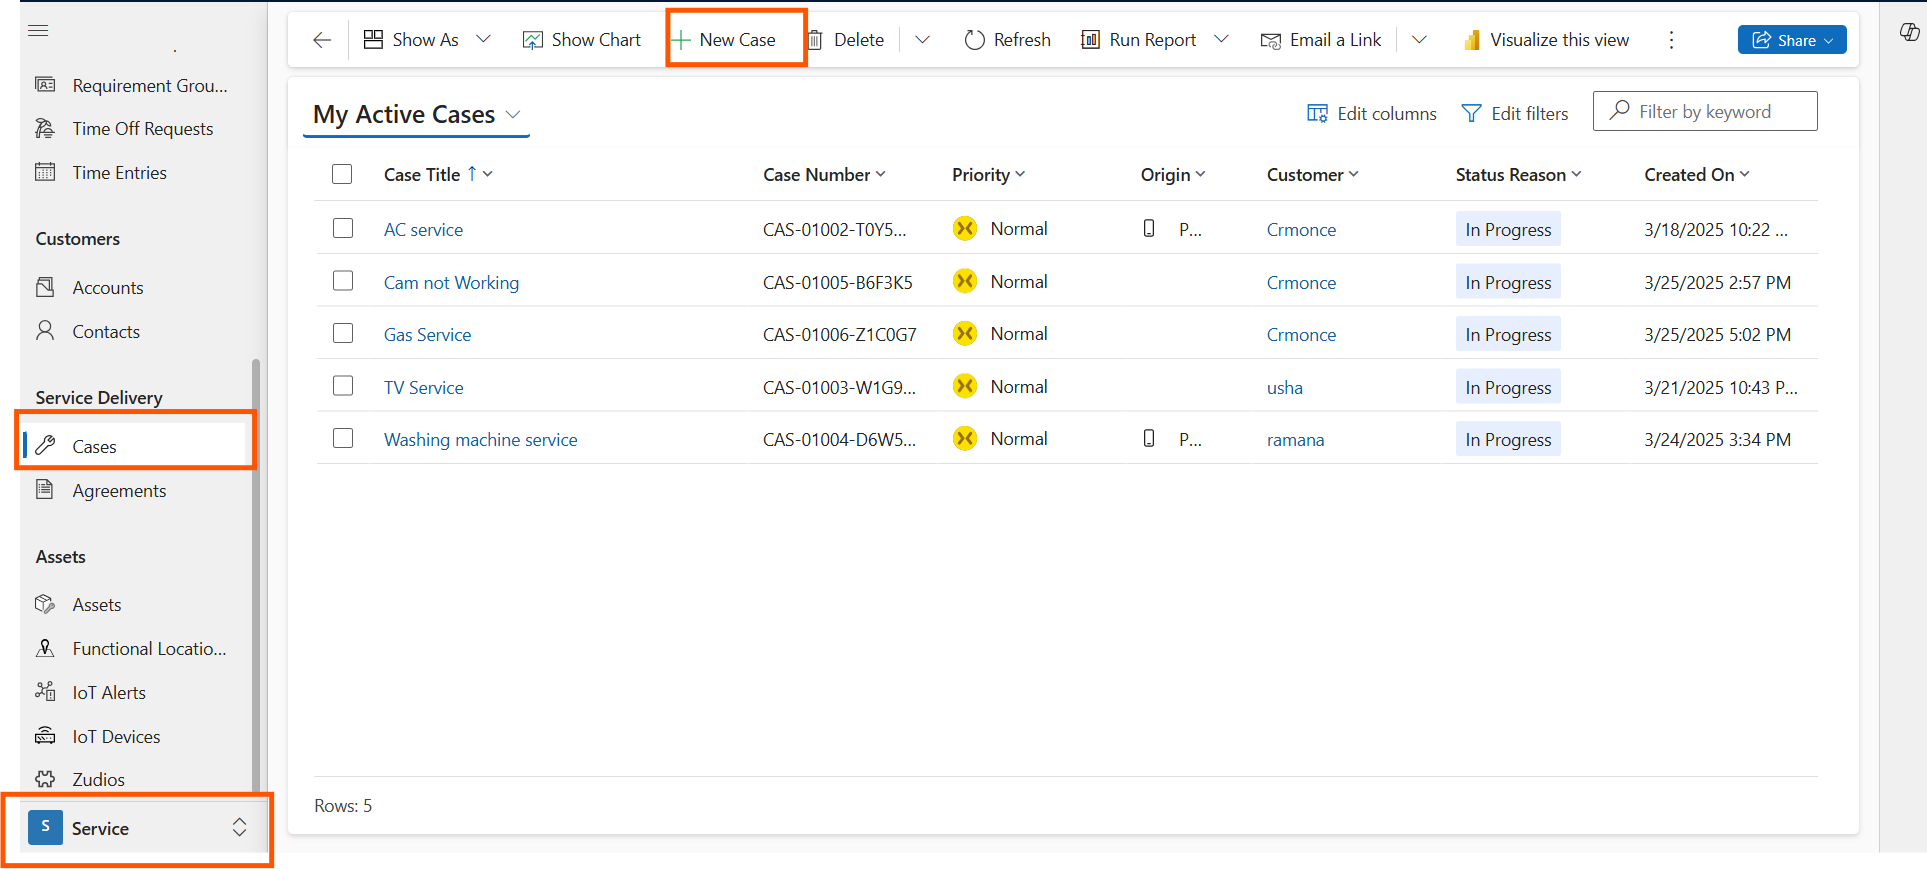
1. Open the Case Module
Log in to CRM and navigate to Service > Cases.
Click New Case to start a new entry.
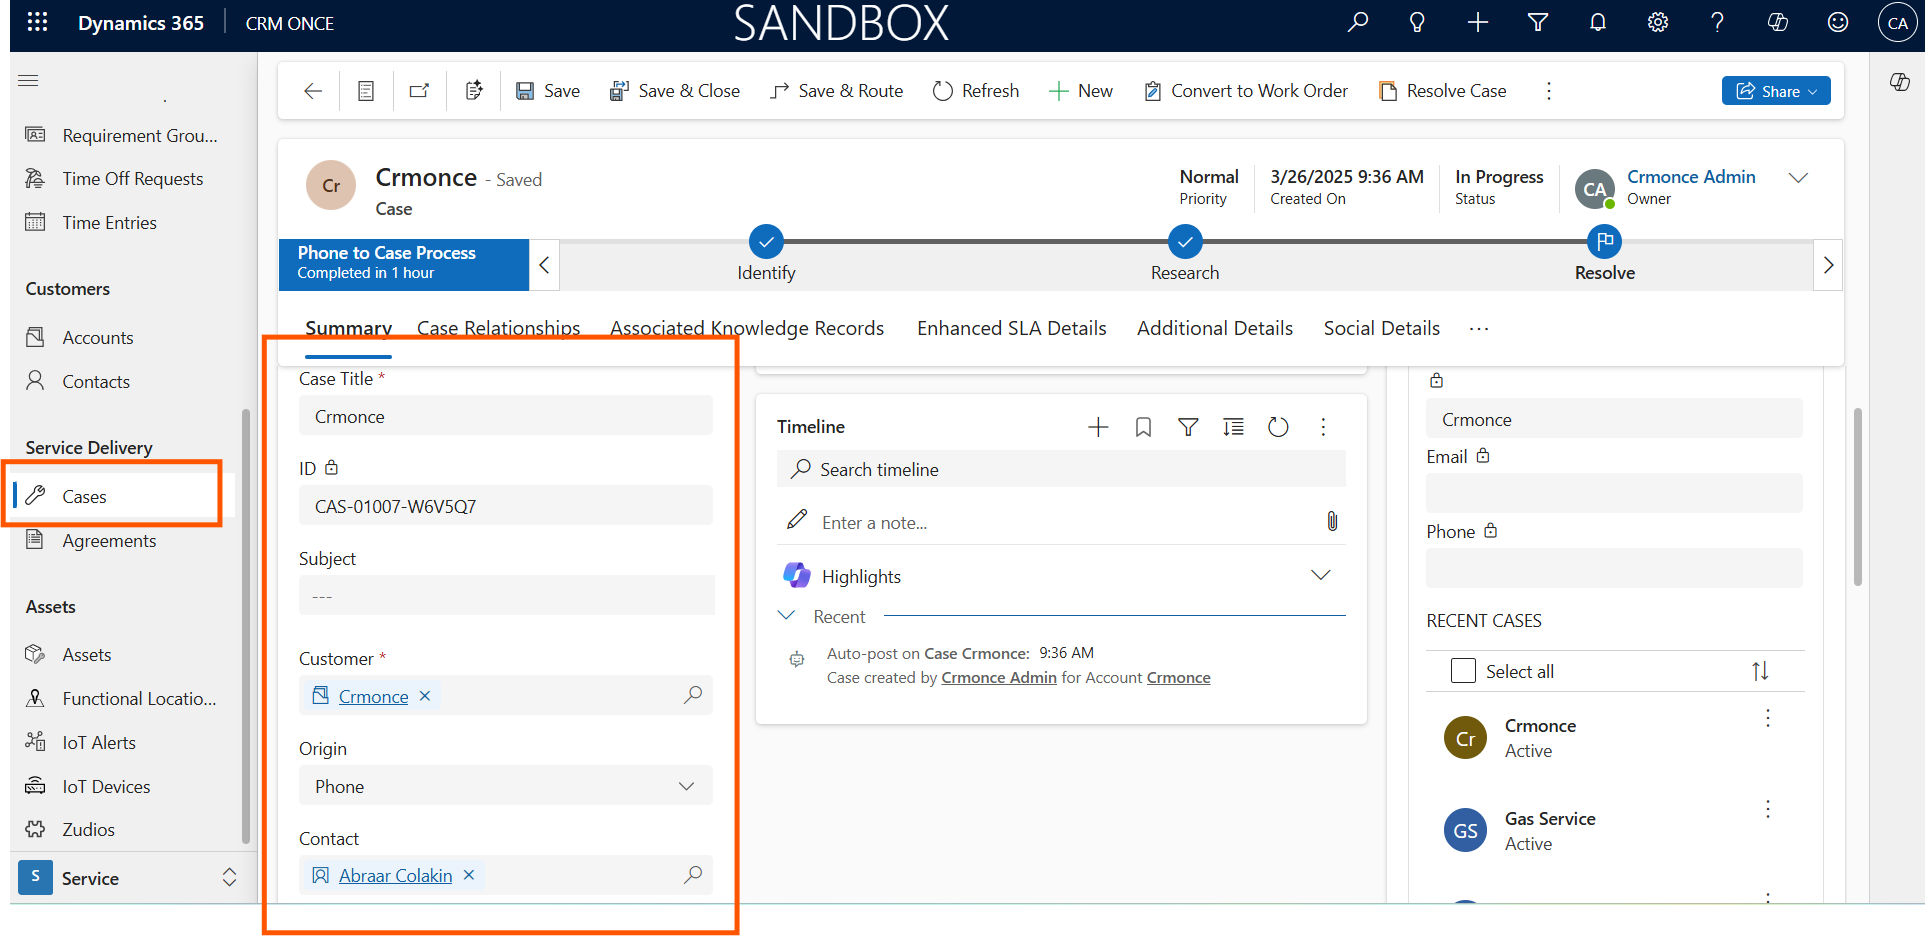
2. Enter Case Details
Title: Briefly describe the issue.
Customer: Select the customer reporting the problem.
Contact: Auto-filled if linked to an existing customer.
Case Type: Choose Incident, Request, or Complaint.
Priority: Set to Low, Medium, or High.
Status: Default is Open.
Description: Provide issue details.
- Incident Type: Select the predefined incident type that categorizes the issue. This ensures proper tracking and helps define required service tasks when converting to a work order.