Use Postman Tool To Retrieve Data:
Quickly retrieving data in Dynamics CRM is one of the frequent uses for CRM Web APIs. The Postman tool allows us to meet this requirement more quickly. Here is an illustration of retrieving a Data
Go to the Azure Portal (https://portal.azure.com/) and the look for or search for App Registration
Now, register a new App in the App Registration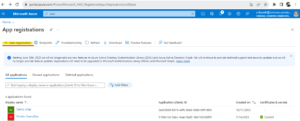
And finally click on Register.


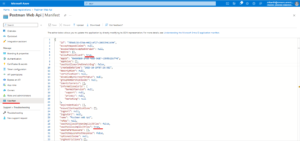
Next is updating the Manifest to support this setup.
Set the “allowPublicClient” flag to true and “oauth2AllowImplicitFlow” to true as well.
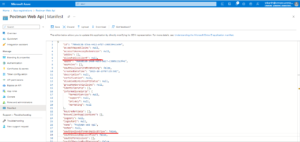
Once the Manifest is updated, it should look like this –
Final step is to give permissions for Dynamics 365 to this App we just created. Go to API Permissions tab from the left-hand menu and click on + Add a permission button.And then Look for the Dynamics CRM option and select it.And then then click on Add permissions.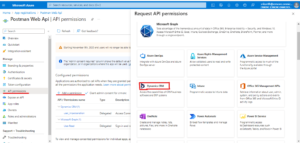
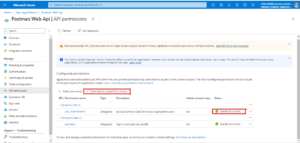
Once added, you’ll need to Grant Permissions. At this moment when it’s not granted, the Status can be seen as blank And then Select Yes to Grant Permissions. Once granted, the Status will be updated as follows – the status of Granted for [OrgName] will appear
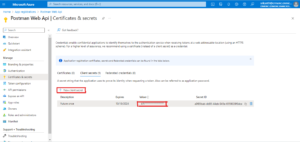
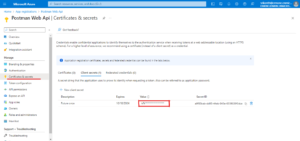
Go to Certificates and secrets tab from the left-hand menu and click on + New client secret button.look for client secret value copy the same and save it somewhere temporarily.Because it can visible only one time.
Final step is to give permissions to App Users.
Go to https://admin.powerplatform.microsoft.com/ and select environments and then select our enviroment and then click on settings icon and then click on Users & Permissions and choose application users and click +New app user and add app and select Bussiness unit and then edit the security roles and add the system administrar role and then click on Create.
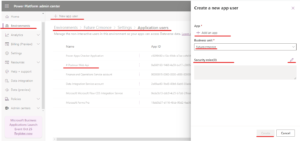
And we are done setting up the App in Azure Portal to be utilized by Postman to test Dynamics 365 Web API locally.
Setting up Postman
Launch the Postman desktop application.
To create a new environment, select Environments on the left and click +.
In the Manage Environments dialog box, select the Add button to add a new environment.start the desktop application for Postman.
In the upper right corner, click the gear icon for Environment Options.
In the dialog box that opens, add a name for the environment.
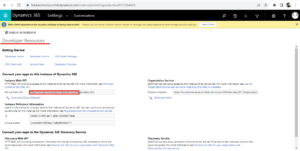
we need Dynamics CRM web API URL, so for that, we have to open the existing CRM Environment and navigate to Settings-> Customizations -> Developer Resources, copy Uri part of Dynamics CRM Environment from Service Root URL, and remove it from /API as shown in the below figure.
1.url
For Initial Value provide the API value that we extracted from above (https://futurecrmonce.api.crm8.dynamics.com)

we must navigate to the Azure portal through portal.azure.com using Dynamics CRM Environment and then search app registrations Applications, select created application and copy application /client id for the app which we registered in the previous post as shown in the below figure.

3.version
Initial Variable: 9.2
navigate to Settings-> Customizations -> Developer Resources. we can see the service root url end .

4.webapiurl
Initial value:
{{url}}/api/data/v{{version}}/

5.callback
Initial Value:http://localhost
navigate to the Azure portal through portal.azure.com using Dynamics CRM Environment and then search app registrations Applications, select created application and then select authentication tab and then see the redirect url and copy the same.
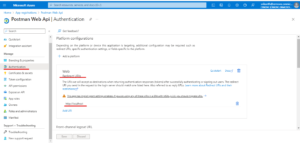
6.authurl
Initial Value : https://login.microsoftonline.com/common/oauth2/authorize?resource={{url}}
7.Tenant id
Navigate to the Azure portal through portal.azure.com using Dynamics CRM Environment and then search app registrations Applications, select created application and copy Tenant id for the app which we registered in the previous post as shown in the below figure.

8.Scopeurl
Initial Value : {{url}}/.default
9.Tokenurl
Initial Value : https://login.microsoftonline.com/organizations/oauth2/v2.0/token
Navigate to the Azure portal through portal.azure.com using Dynamics CRM Environment and then search app registrations Applications, select created application and then click on the end points and Copy auth2 token url interface will shown below.

10. Client secret
Navigate to the Azure portal through portal.azure.com using Dynamics CRM Environment and then search app registrations Applications, select created application
go to Certificates and secrets tab from the left-hand menu and click it and that secret Value Aleardy copied temporarily above. Interface will shown below
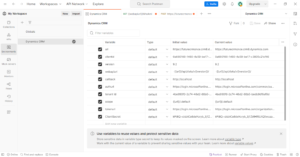
Overview after filled all variables in the environment will shown below below figure.
Enter this in a new Tab in your Postman and then go to authorisation tab and Select
Type : Oauth2.0
Add authourisation data to : request headers
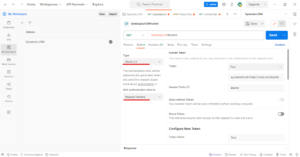
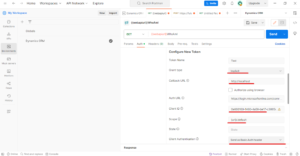
Now, enter the details we have captured so far –
Token Name – Enter a suitable Token name
Grant Type – Select Implicit if not already set.
Callback URL – The callback URI should be http://localhost based on what we set in Azure in above steps.
Auth URL – Here’s how you can get the Auth URL for your Dynamics 365 environment -> OAuth 2.0 URL for Dynamics 365
Client ID – This should be what you saved above from the Azure App Service.This should be the Application ID.
Once all this is entered, click on Get New Access Token
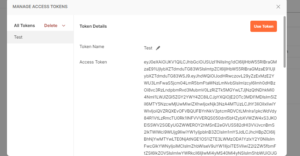
Once you click on Get New Access Token, you’ll need to authenticate into the environment as you usually get while connecting from Browser.If everything goes as configured, enter your credentials and authenticate. You should then get the Manage Tokens page. Click Use Token as indicated in the accompanying figure.
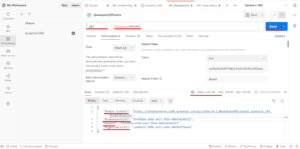
now click on Send request and observe the Body section with user id details of the logged-in CRM User and the status as 200 as shown in the below figure.
For any Help or Queries Contact us on info@crmonce.com or +918096556344.

