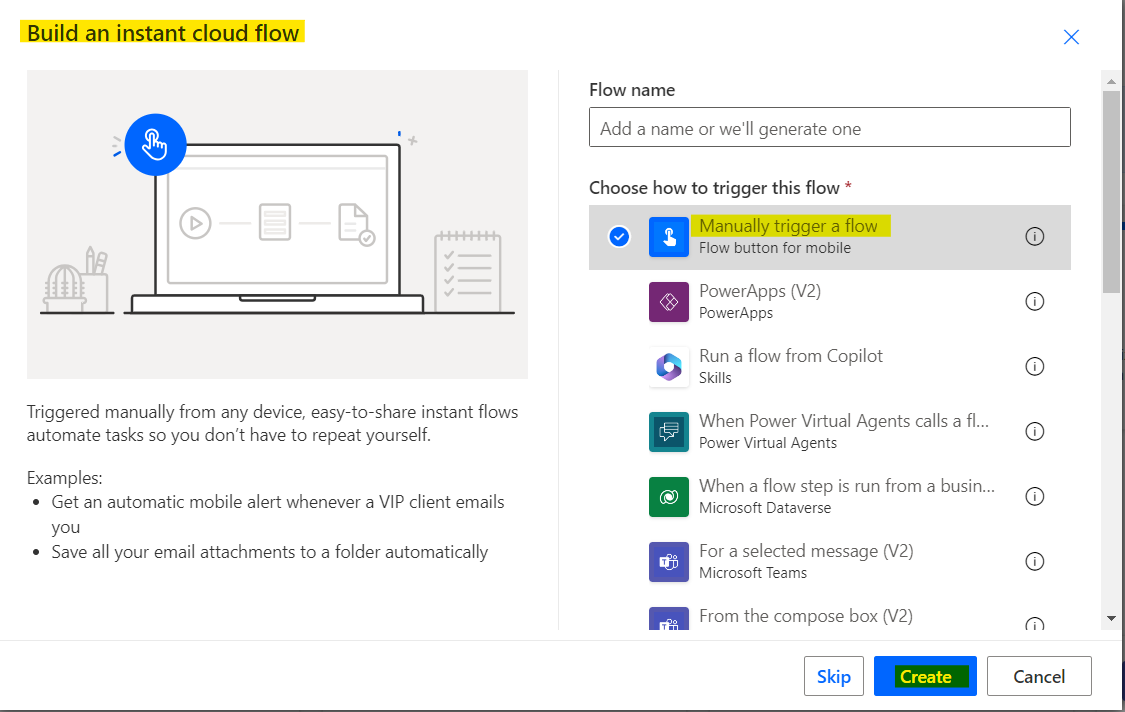
Step-1
log in to Power Automate, select Create, and then choose an instant cloud flow.
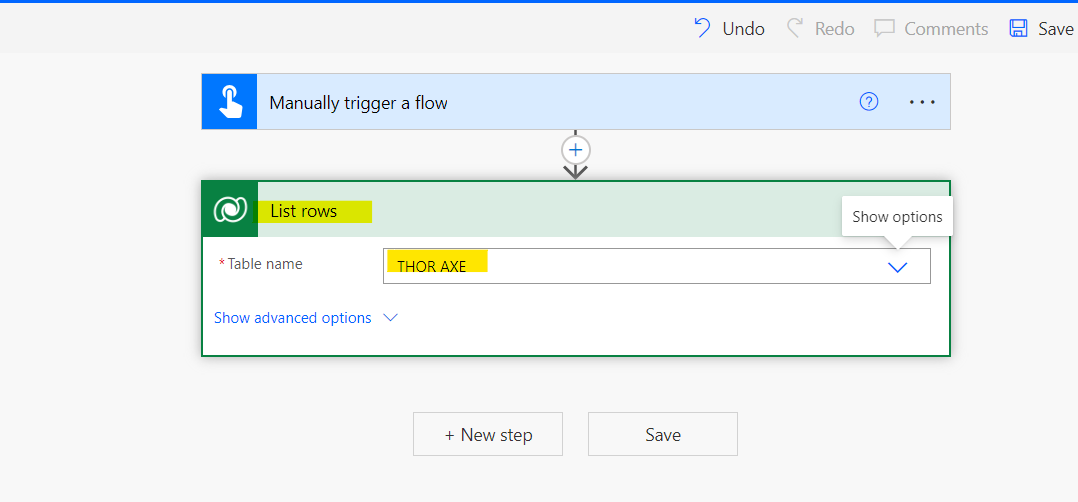
Step-2
We will add List rows action and configuring the Dynamic CRM Instance and List name, click the Next step. This will retrieve every item from the Dynamic CRM list that you have chosen.
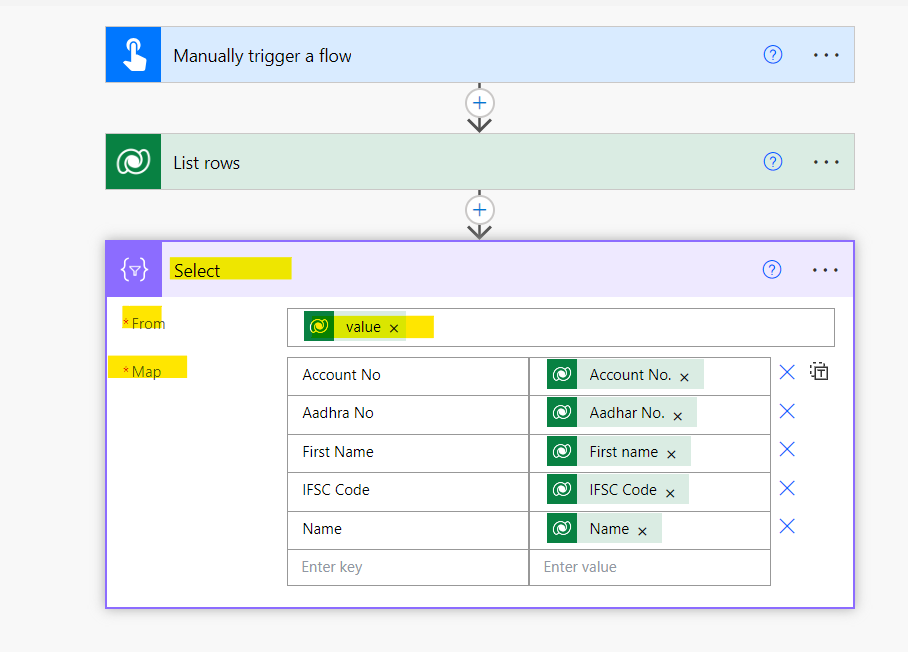
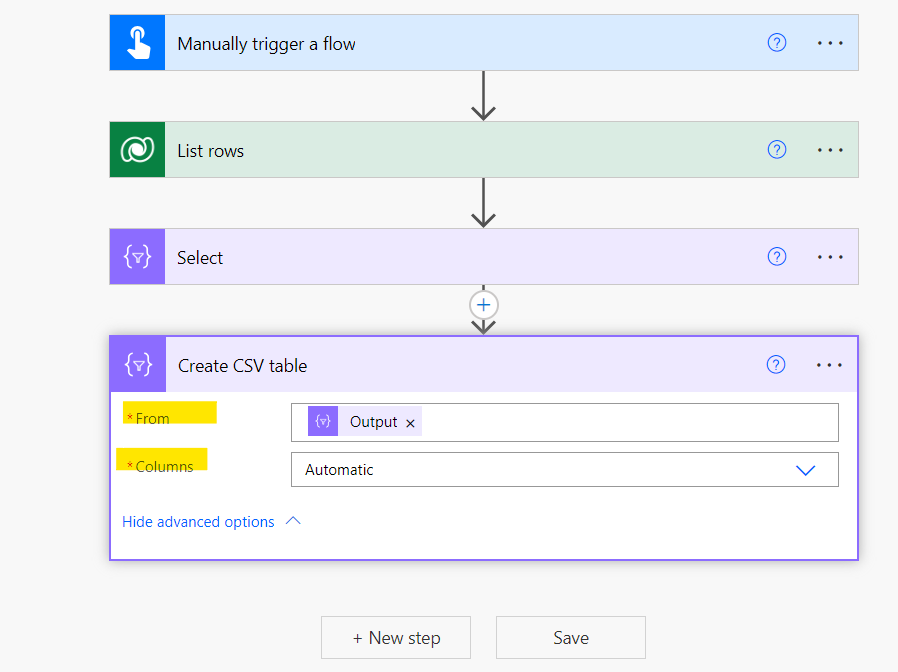
Step-3
To map the key-value pair using the “Select” data operation, click the next step now. Next, include the value from the dynamic content in the “From box.” Next, by adding the key-value pair to the Map box, we will map values dynamically.
Step-4
Add the “Create HTML table” action from the action triggers.
Step-5
To apply the style for the generated HTML table, we will now add a compose action. To do this, add the CSS code below.
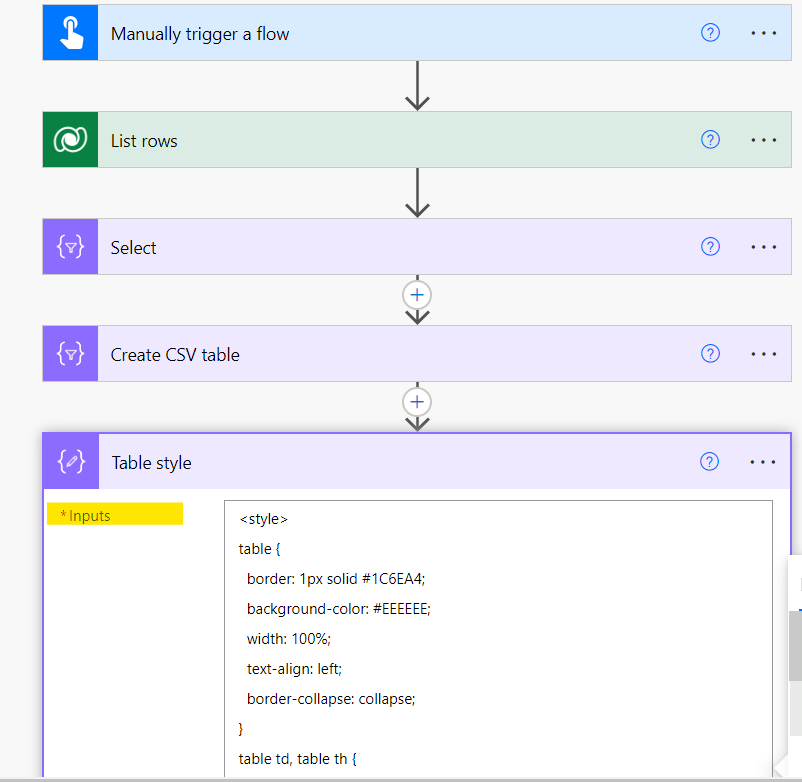
<style>
table {
border: 1px solid #1C6EA4;
background-color: #EEEEEE;
width: 100%;
text-align: left;
border-collapse: collapse;
}
table td, table th {
border: 1px solid #AAAAAA;
padding: 3px 2px;
}
table tbody td {
font-size: 13px;
}
table thead {
background: #1C6EA4;
border-bottom: 2px solid #444444;
}
table thead th {
font-size: 15px;
font-weight: bold;
color: #FFFFFF;
border-left: 2px solid #D0E4F5;
}
table thead th:first-child {
border-left: none;
}
</style>
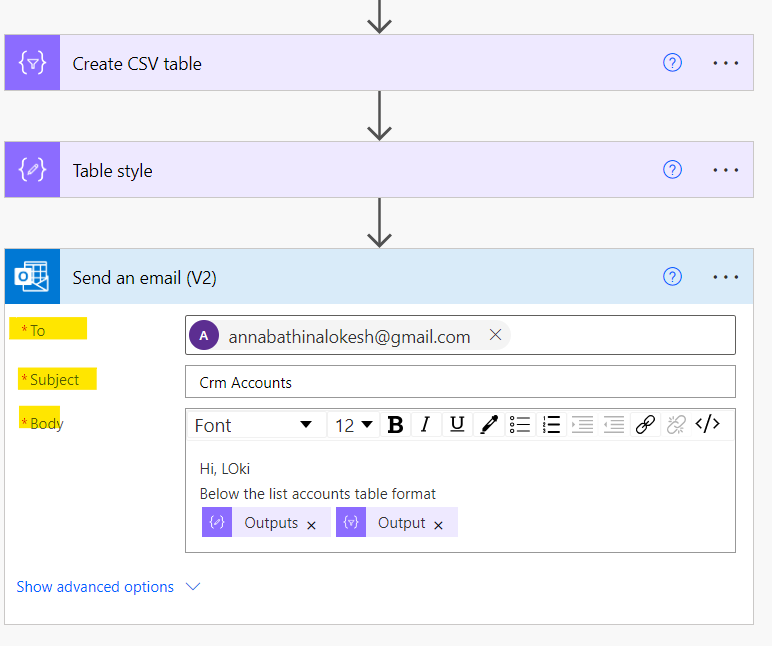
Step-6
Choose the Send an Email (V2) (outlook) action to send an email. Pass the dynamic content user’s email address in the To address field.
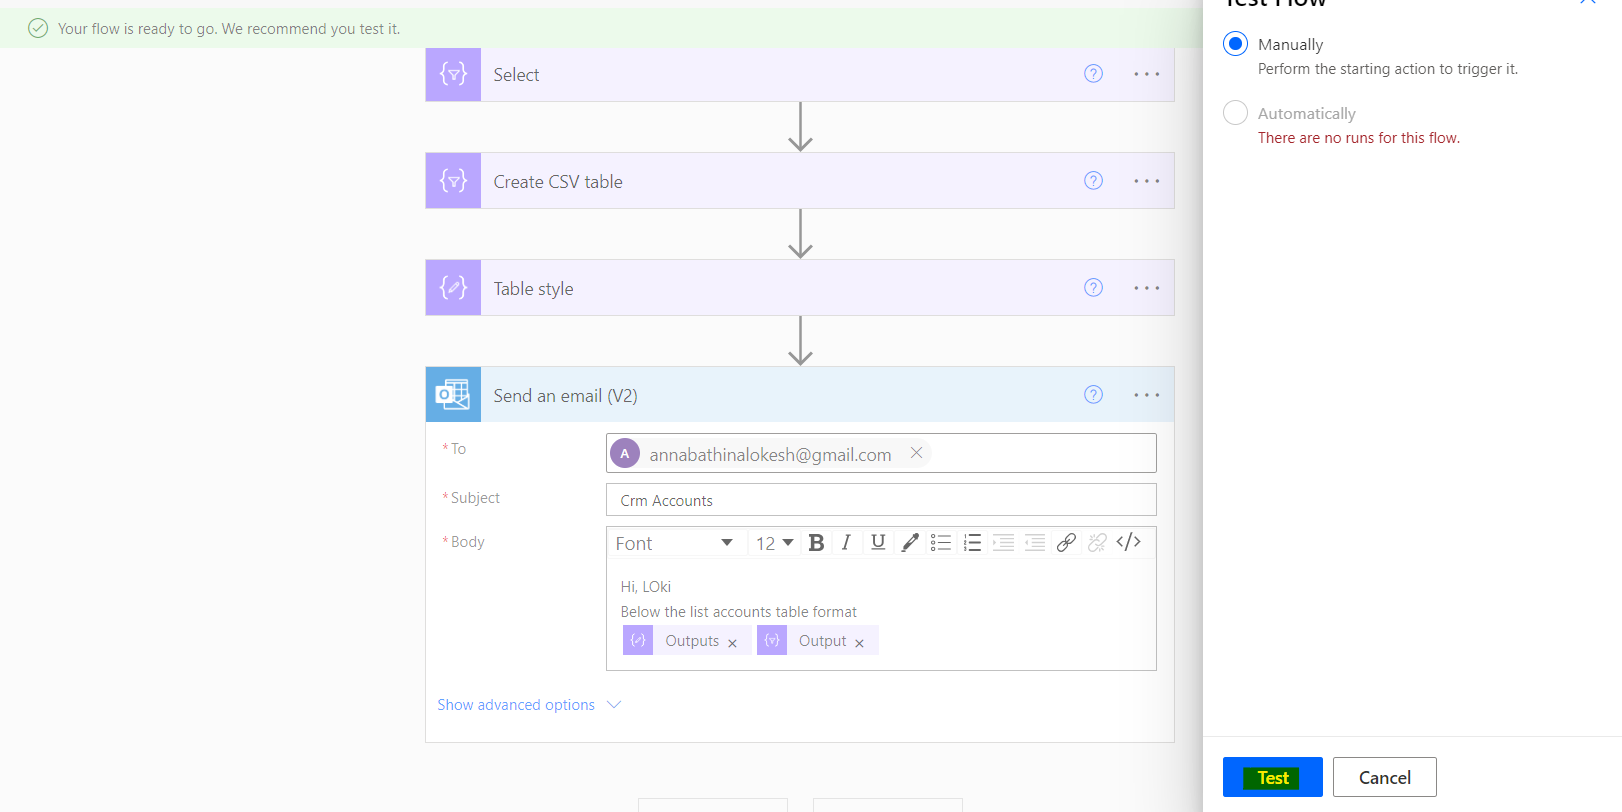
Step-7
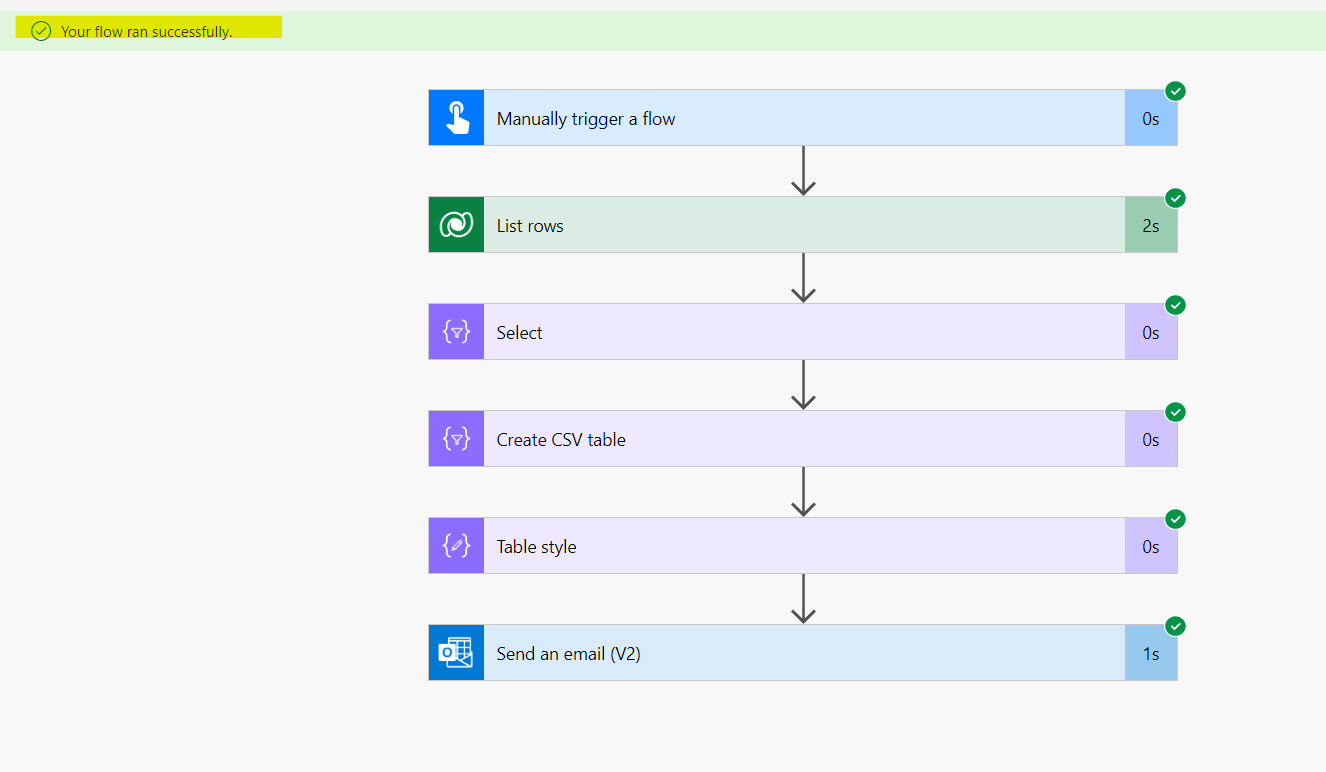
Now ready to run the flow. save and test it
Step-8
See the flow run the successfully.